The Gateway Arch, located in St. Louis, Missouri, is an iconic monument symbolizing the westward expansion of the United States. It is the centerpiece of the Gateway Arch National Park and stands as the tallest arch in the world and the tallest man-made monument in the Western Hemisphere.
Fun Fact: At the top of the arch, the observation deck has small windows that let you peer out to incredible views. On clear days, you can see up to 30 miles in every direction! The cars are pretty small and only sit about 4 or 5 people at most. However the view is totally worth it and I have a couple of photos from up top down below.
Want to enjoy your freshly brewed beer without the hassle of bottling? It’s time to build your own kegerator and pour the perfect pint straight from the tap!
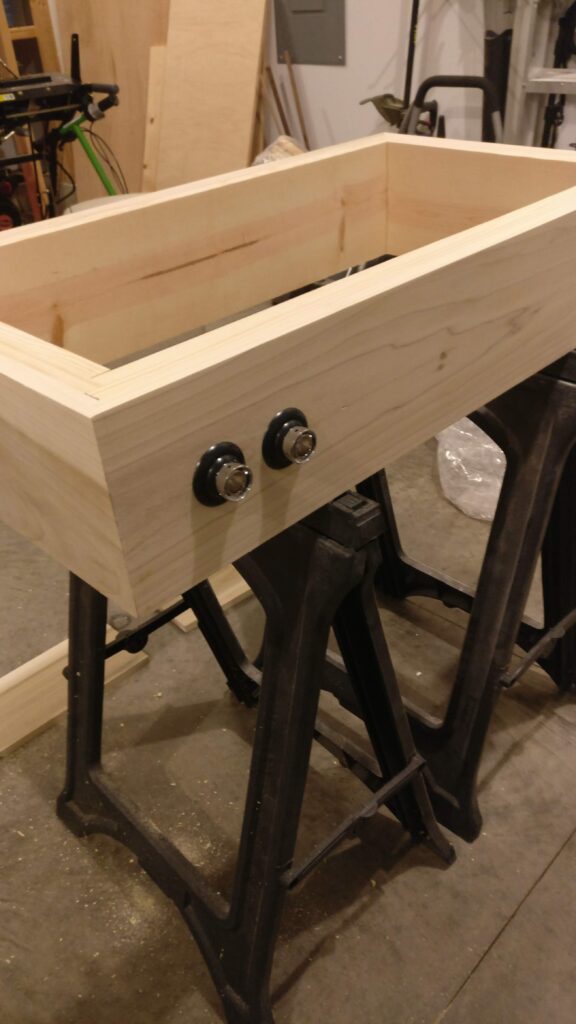
I wanted to share some photos of my adventures of building a kegerator. I started off with a RCA 7.1 Cu Ft chest freezer. I ordered it from Walmart, so it could be just delivered to my house. Its important to know the height of your kegs for this next part to determine how tall you want your collar (wood part that sits on top of the freezer) to be. Here I placed the keg in the freezer. With chest freezers there is the deep part and the shelf that the motor sits below, so take both of those into consideration.
I then figured out what lumber I needed, I don’t remember the exact size, but something like a 1×8 or 1×10 hardwood board, like poplar or oak. As you can see, there is an inside and outside of the collar, I left the width of the board between them. Then lastly for installation, I used spray foam installation to keep the cool in and the hot out.
From here, I figured out how far apart I wanted my taps to be. It would be good to have your taps for measurement.
I was now able to drill all 4 holes and start preparing the food for finish.
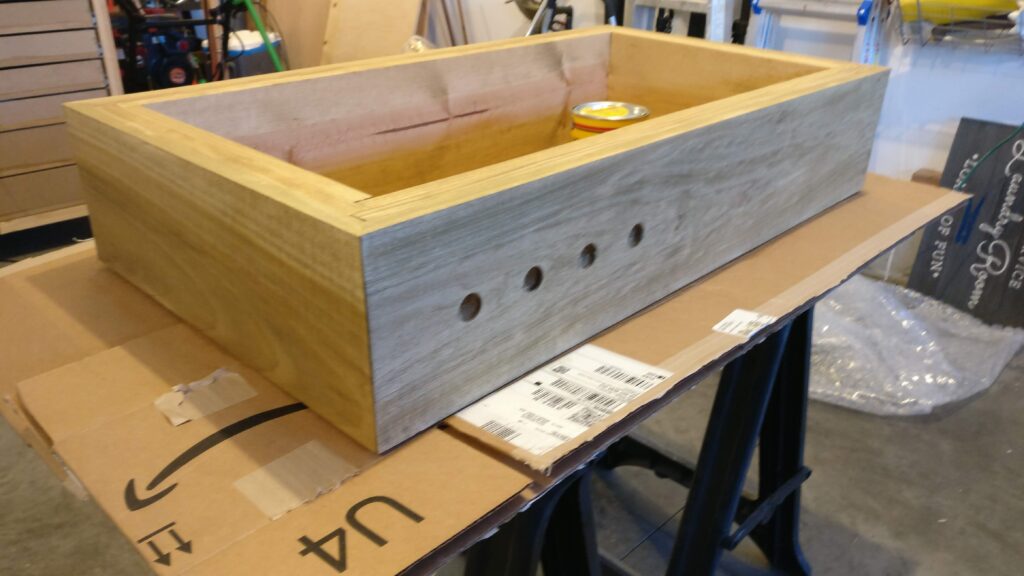
I stained it with a oil finish and a pretty light natural color, but here is your chance to customize it to what you would like.
I now have the collar sitting on the freezer and also attached the lid to the collar.
If you seen my toolbox post, you would see it has wheels. Well I decided to do something similar here, so I could move it easily in the garage (and clean around it).
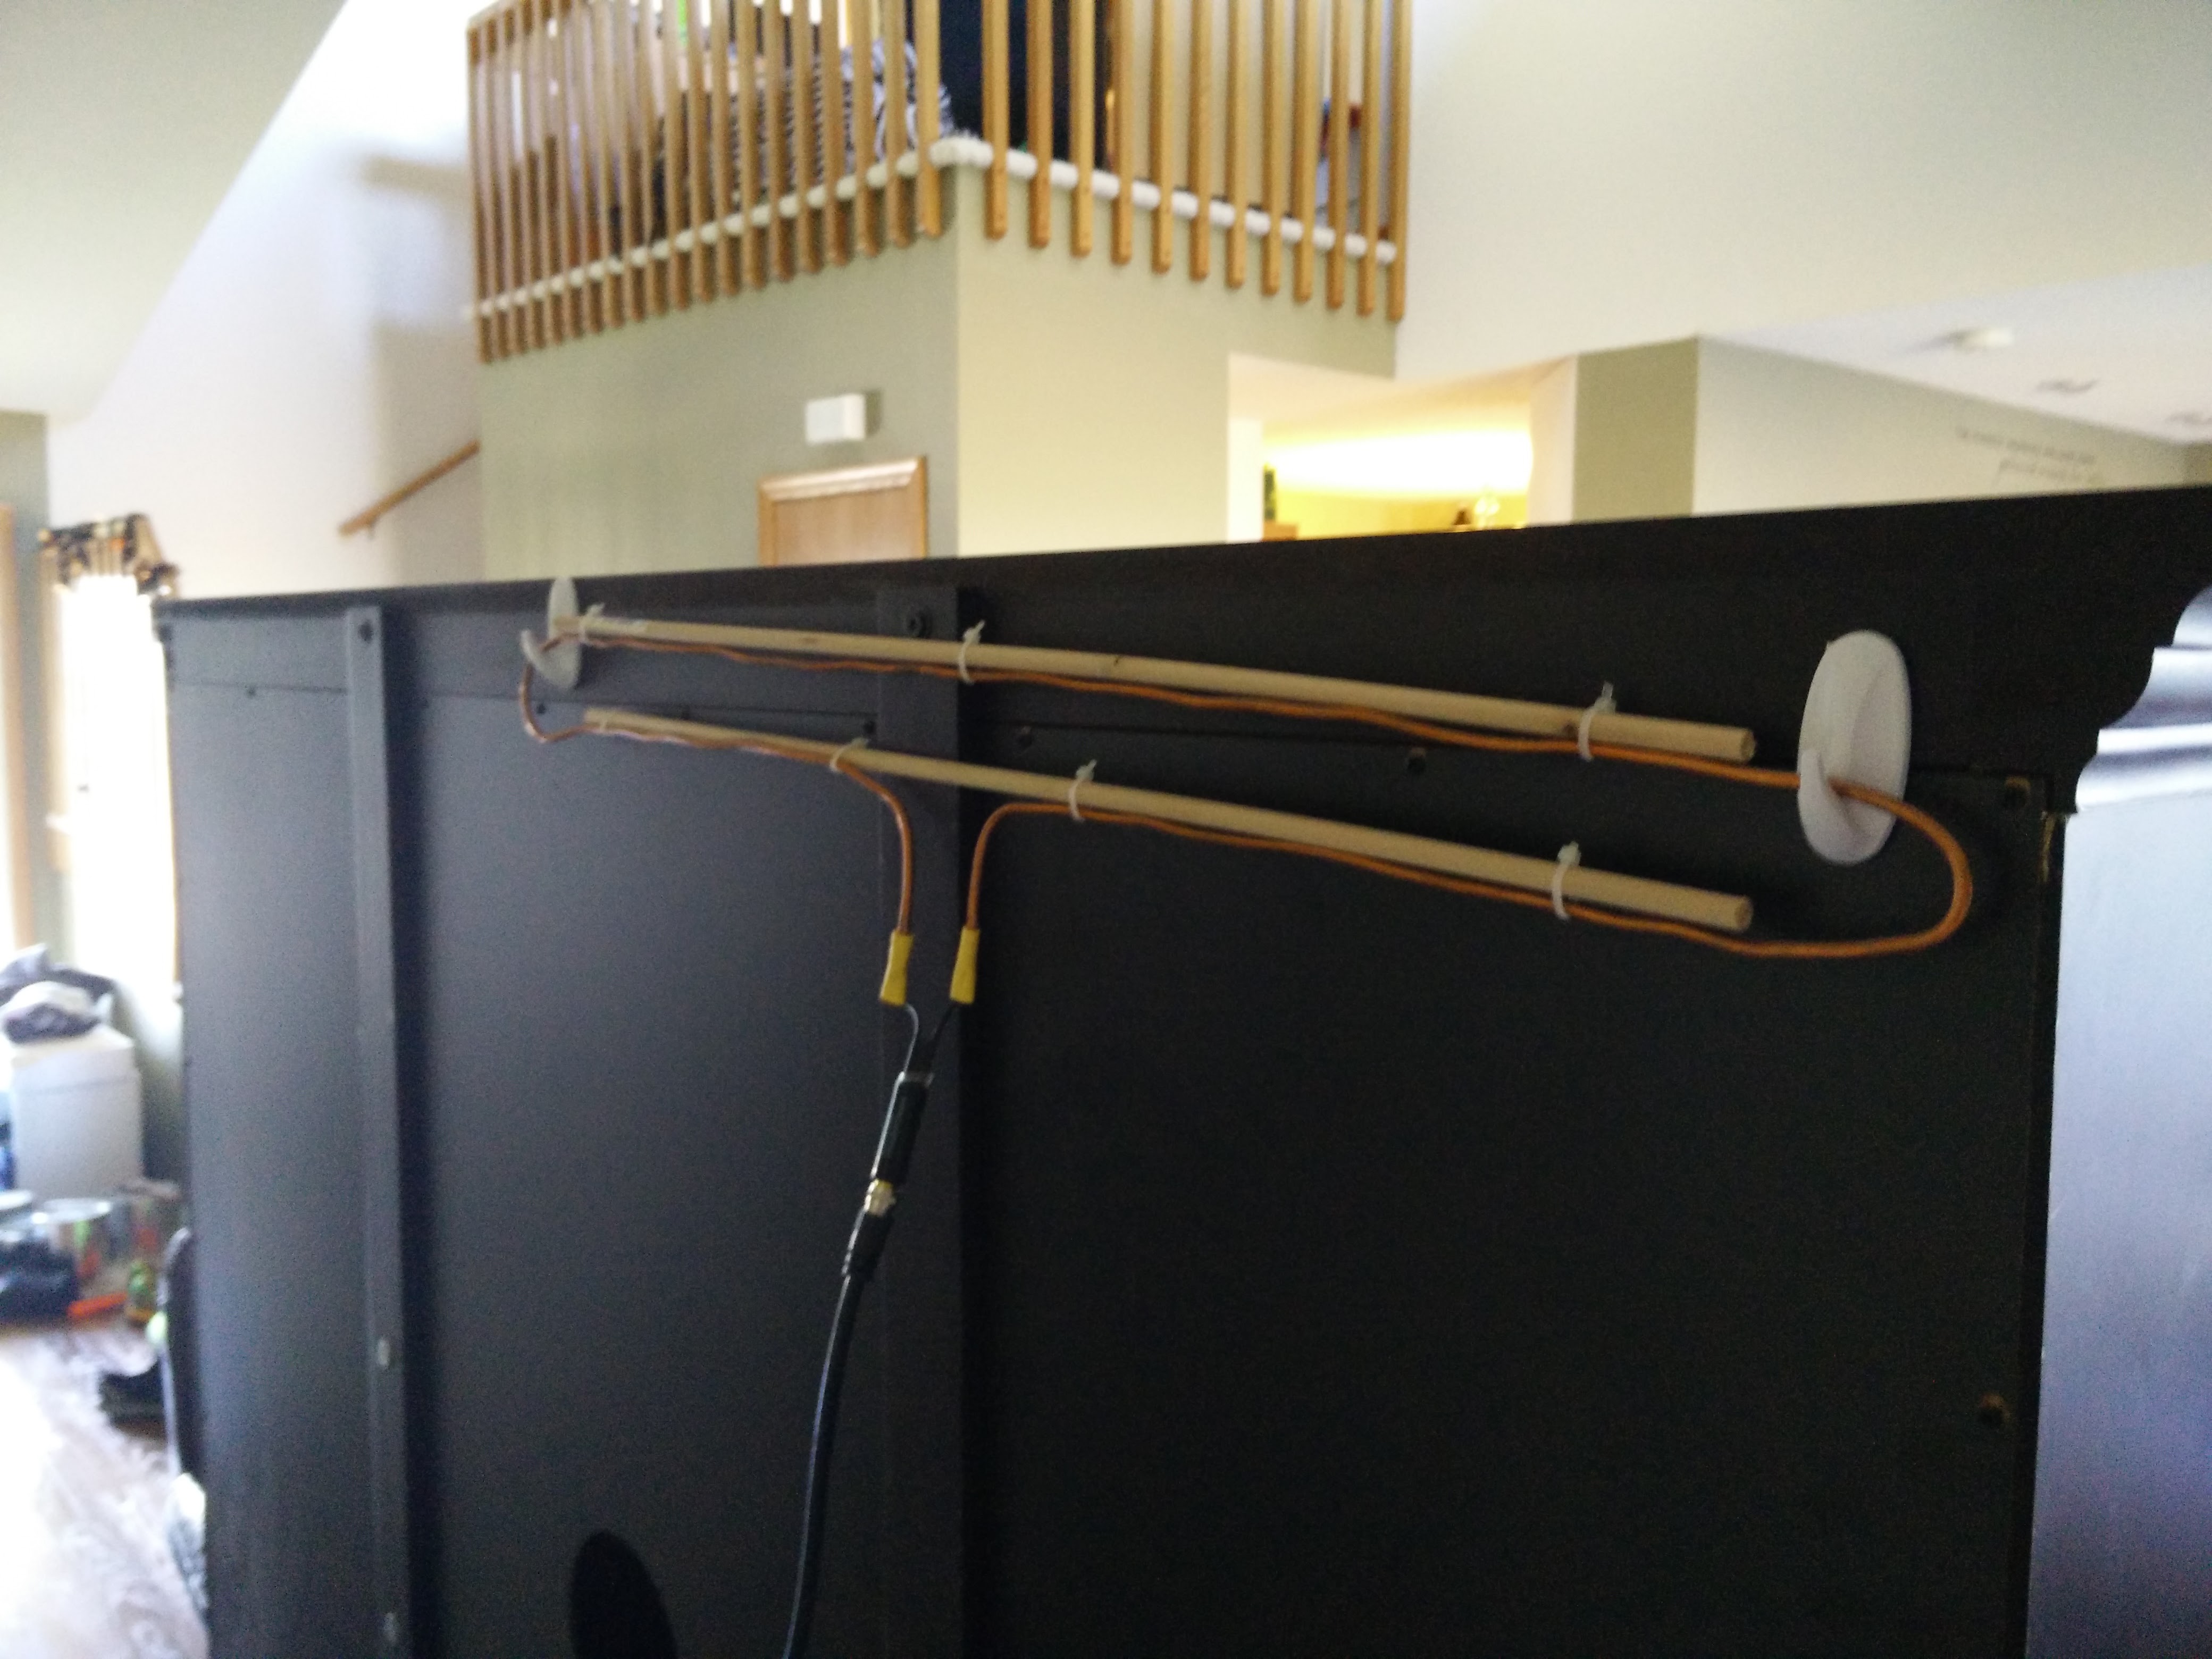
Since a freezer main purpose is to freeze, its important to use some type of temperature controller to manage the temperature. This one you plug the freezer into the controller, then set the temperature to your desired on and off, eg on at 38 degrees and off at 33 degrees. The controller would have a temperature probe that you need to also put in the freezer.
Here is a photo of the gas regulator. It allows you to use 1 CO2 tank for multiple kegs. I then ran the gas lines to the kegs (red lines here), and the clear lines are the beer out lines to the taps.
I ended up buying a CO2 regulator that would allow multiple pressures depending on your beer. I did dedicate one keg to root beer, so I typically ran higher levels of gas to that keg.
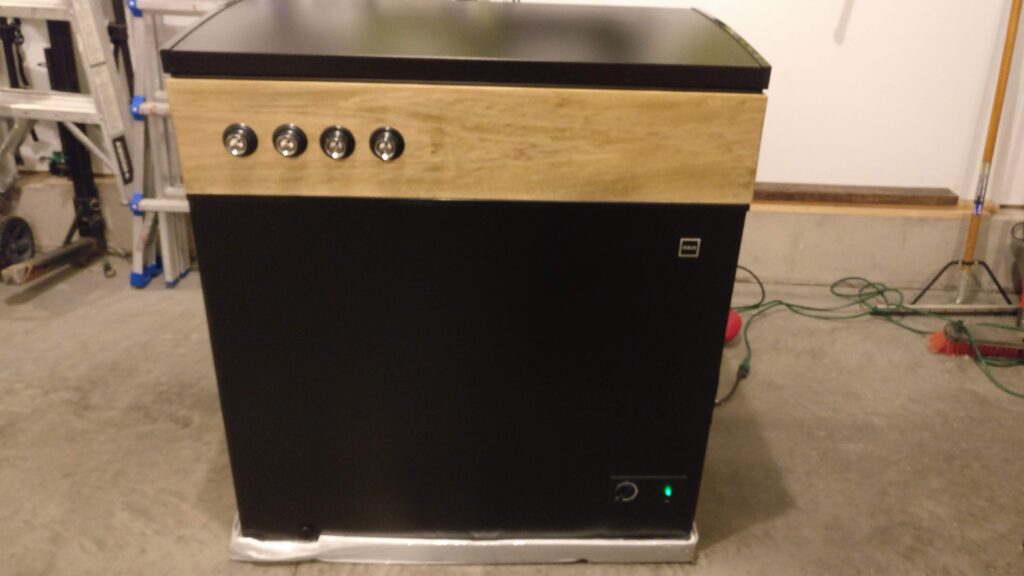
Once again, this is the final product. I did find this project took a decent amount of homework, as I was starting with nothing. I had to purchase Kegs, the freezer, wood to build collar, CO2, gas regulator, gas distribution, taps, lines, and temperature controller. I am sure I forgot something in that list as well. Overall I am very happy with how the kegerator turned out and found it to be a very rewarding experience, especially when you can enjoy a nice cold beer.
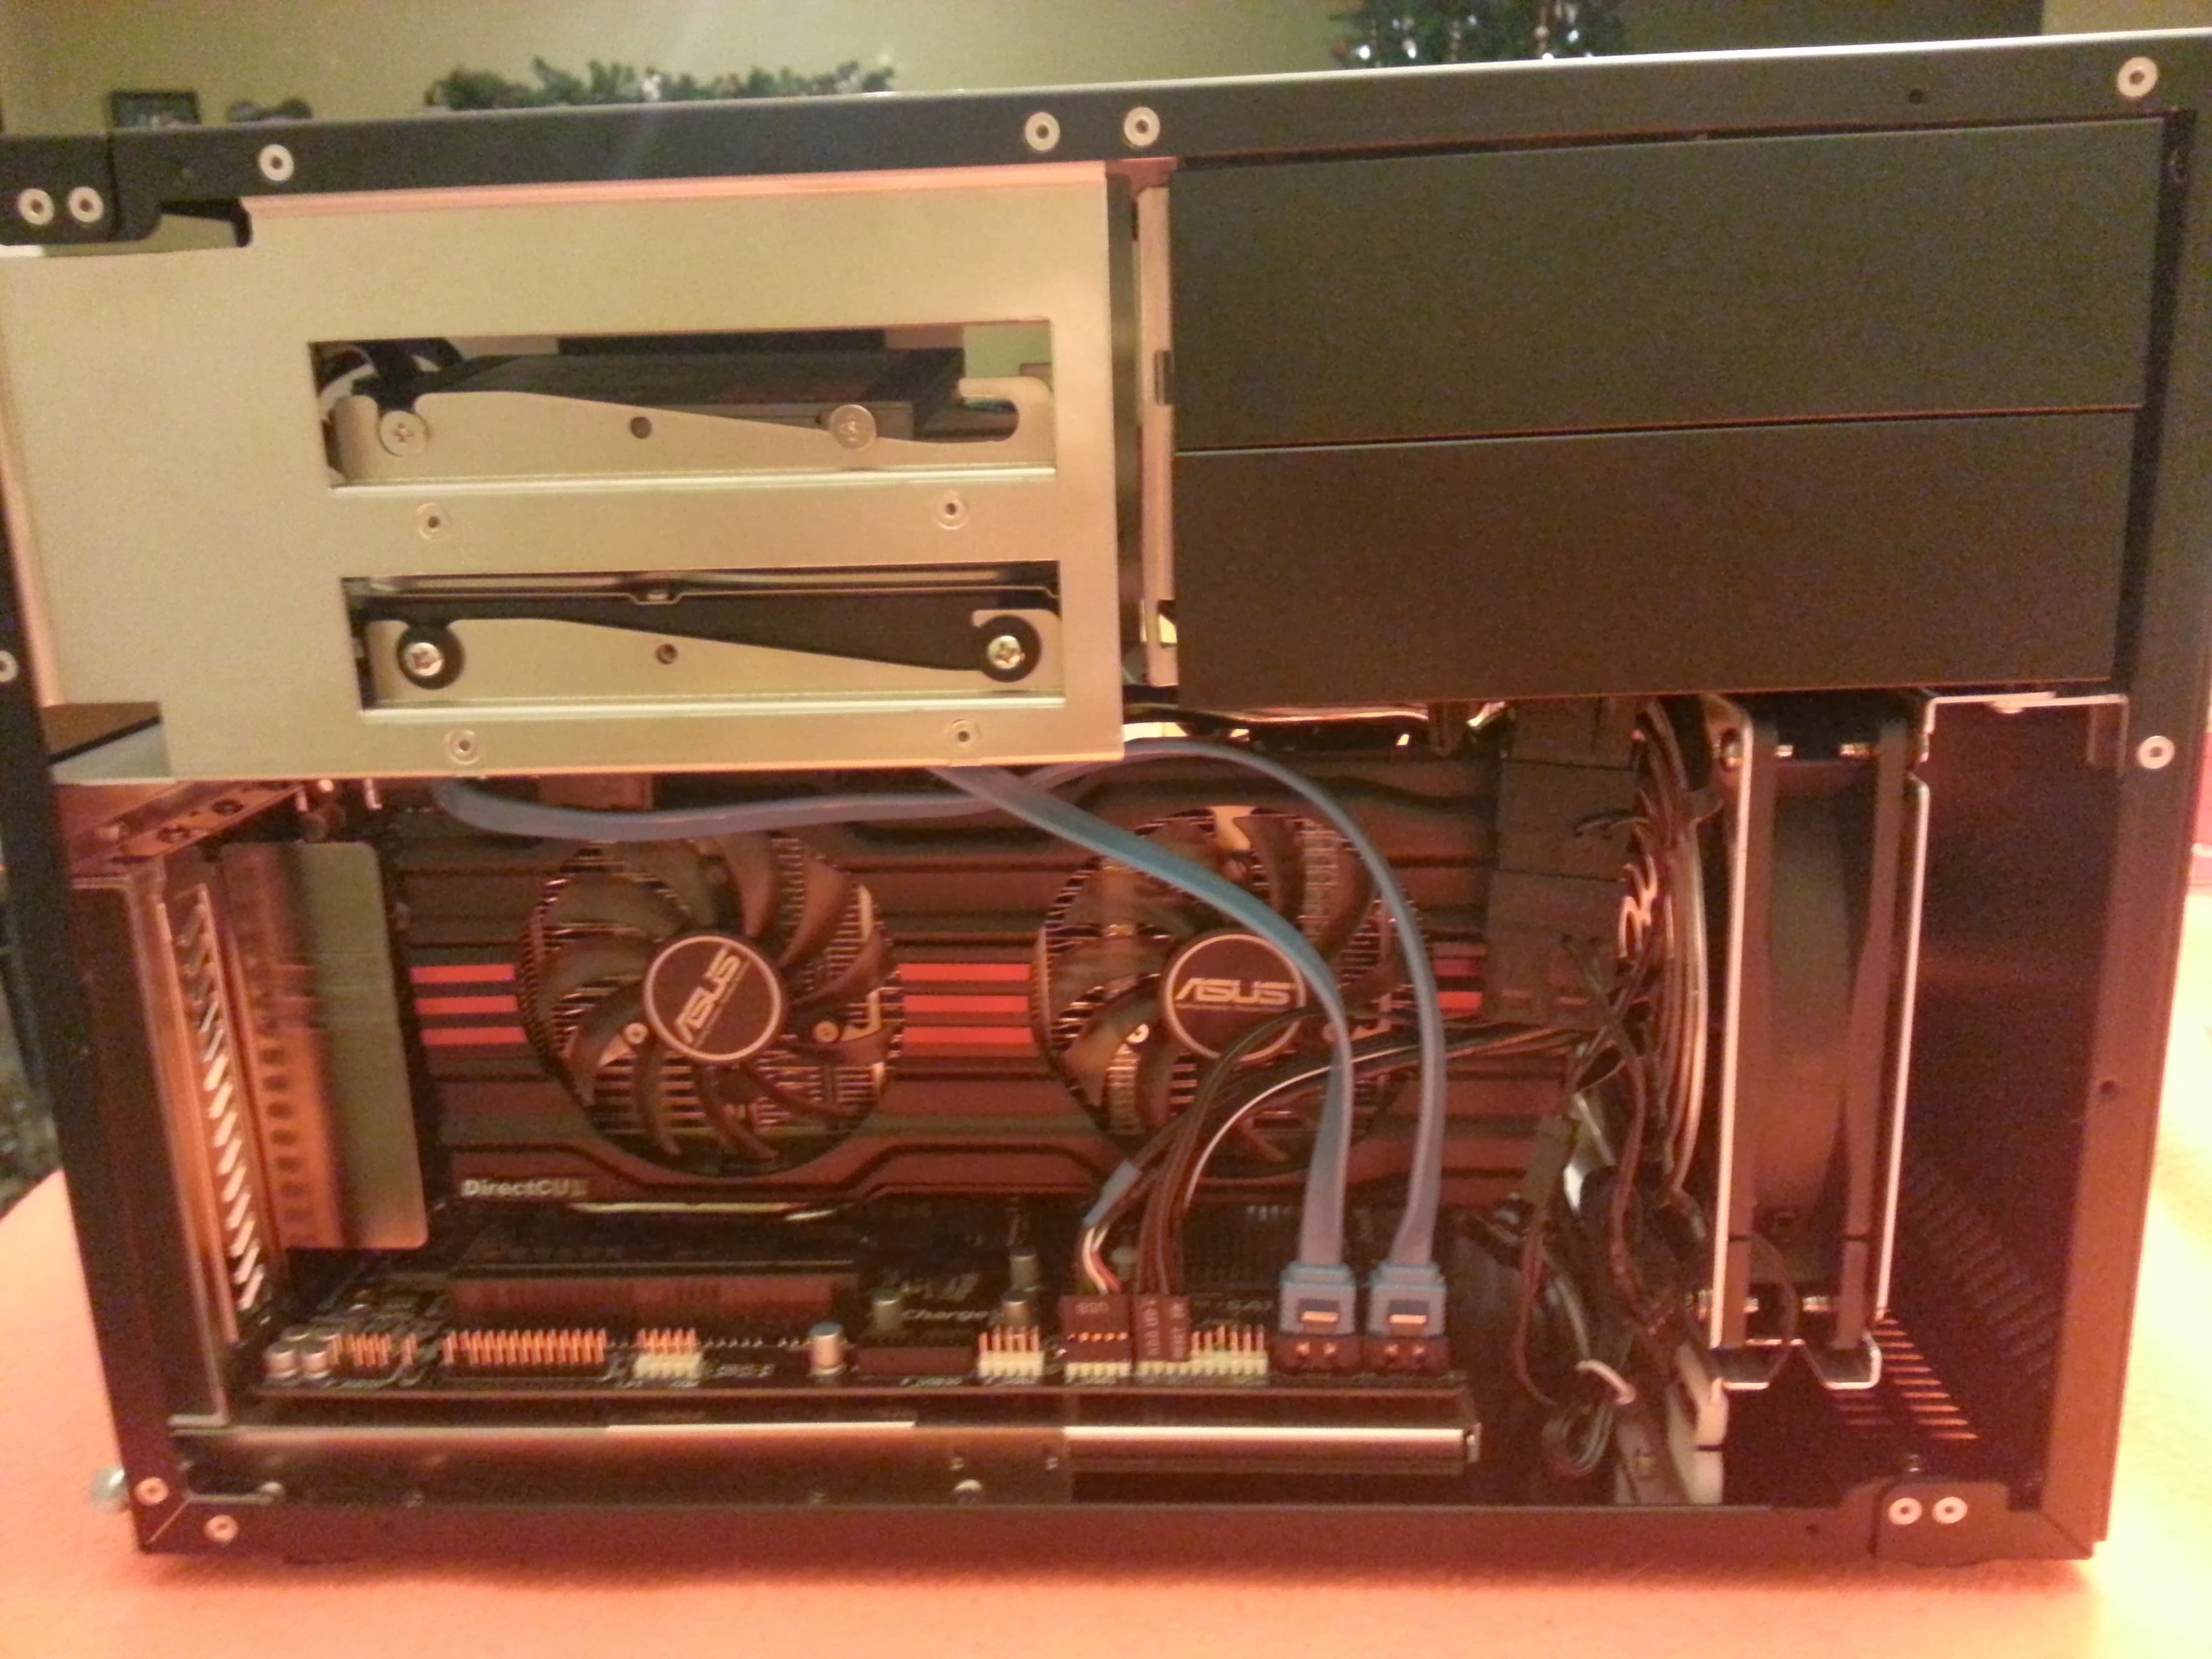
It’s that time again—time to build a new computer! My last build was way back in 2010 (check it out here: https://akschaefer.com/2010/03/11/my-new-desktop/), and it’s definitely starting to show its age.
The first big decision was AMD vs. Intel, and from there, the rest of the parts naturally fell into place. As a long-time AMD fan, I decided to go with the AMD Ryzen series and chose the AMD Ryzen 7 1700—a solid 8-core processor that offers excellent performance for its price.
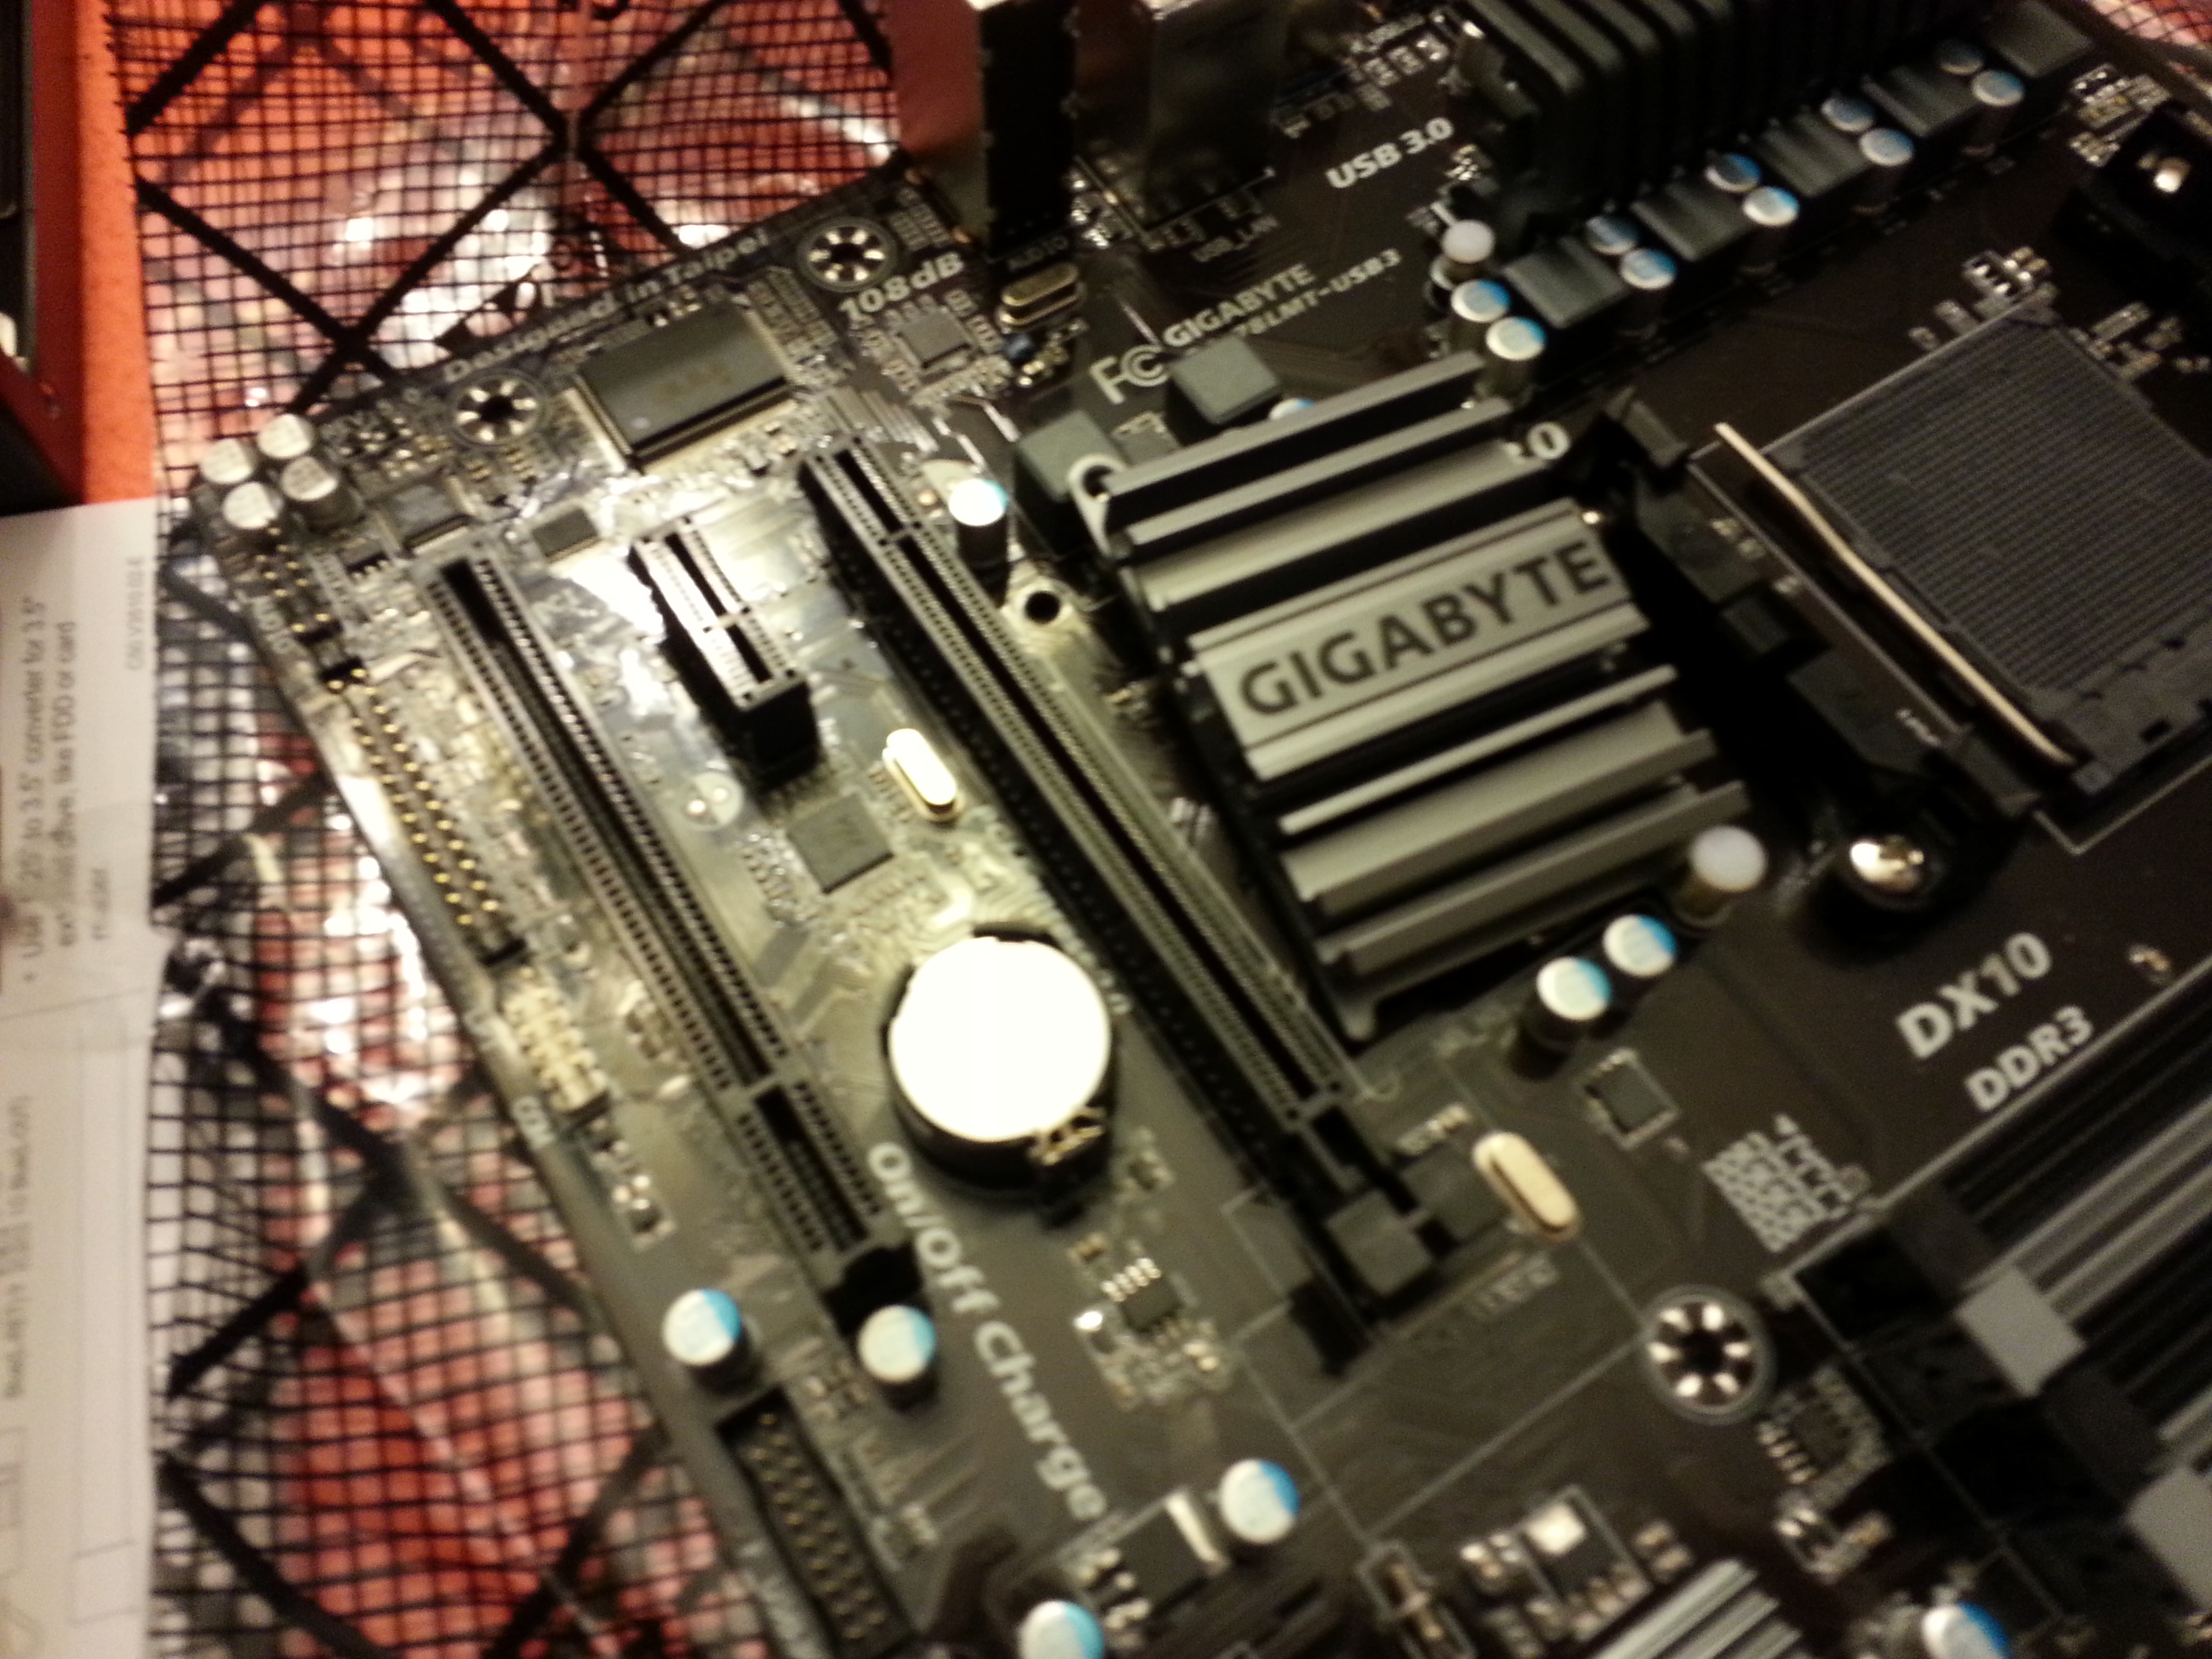
For the motherboard, I opted for the Gigabyte GA-AB350-GAMING 3, which has plenty of I/O to meet my needs. To complement it, I selected G.Skill Ripjaws V Series 16GB (2x8GB) of RAM, which provides great speed and reliability.
When it came to the graphics card, I decided to reuse my Gigabyte NVIDIA GTX 960. Even though it’s a mid-grade card, it’s still holding its own and should serve me well for a few more years.
For storage, I went with a Samsung 850 EVO 500GB SSD as the primary OS drive for its blazing-fast read/write speeds. For additional storage, I added a Seagate Barracuda 2TB drive, which offers plenty of space for files and media.
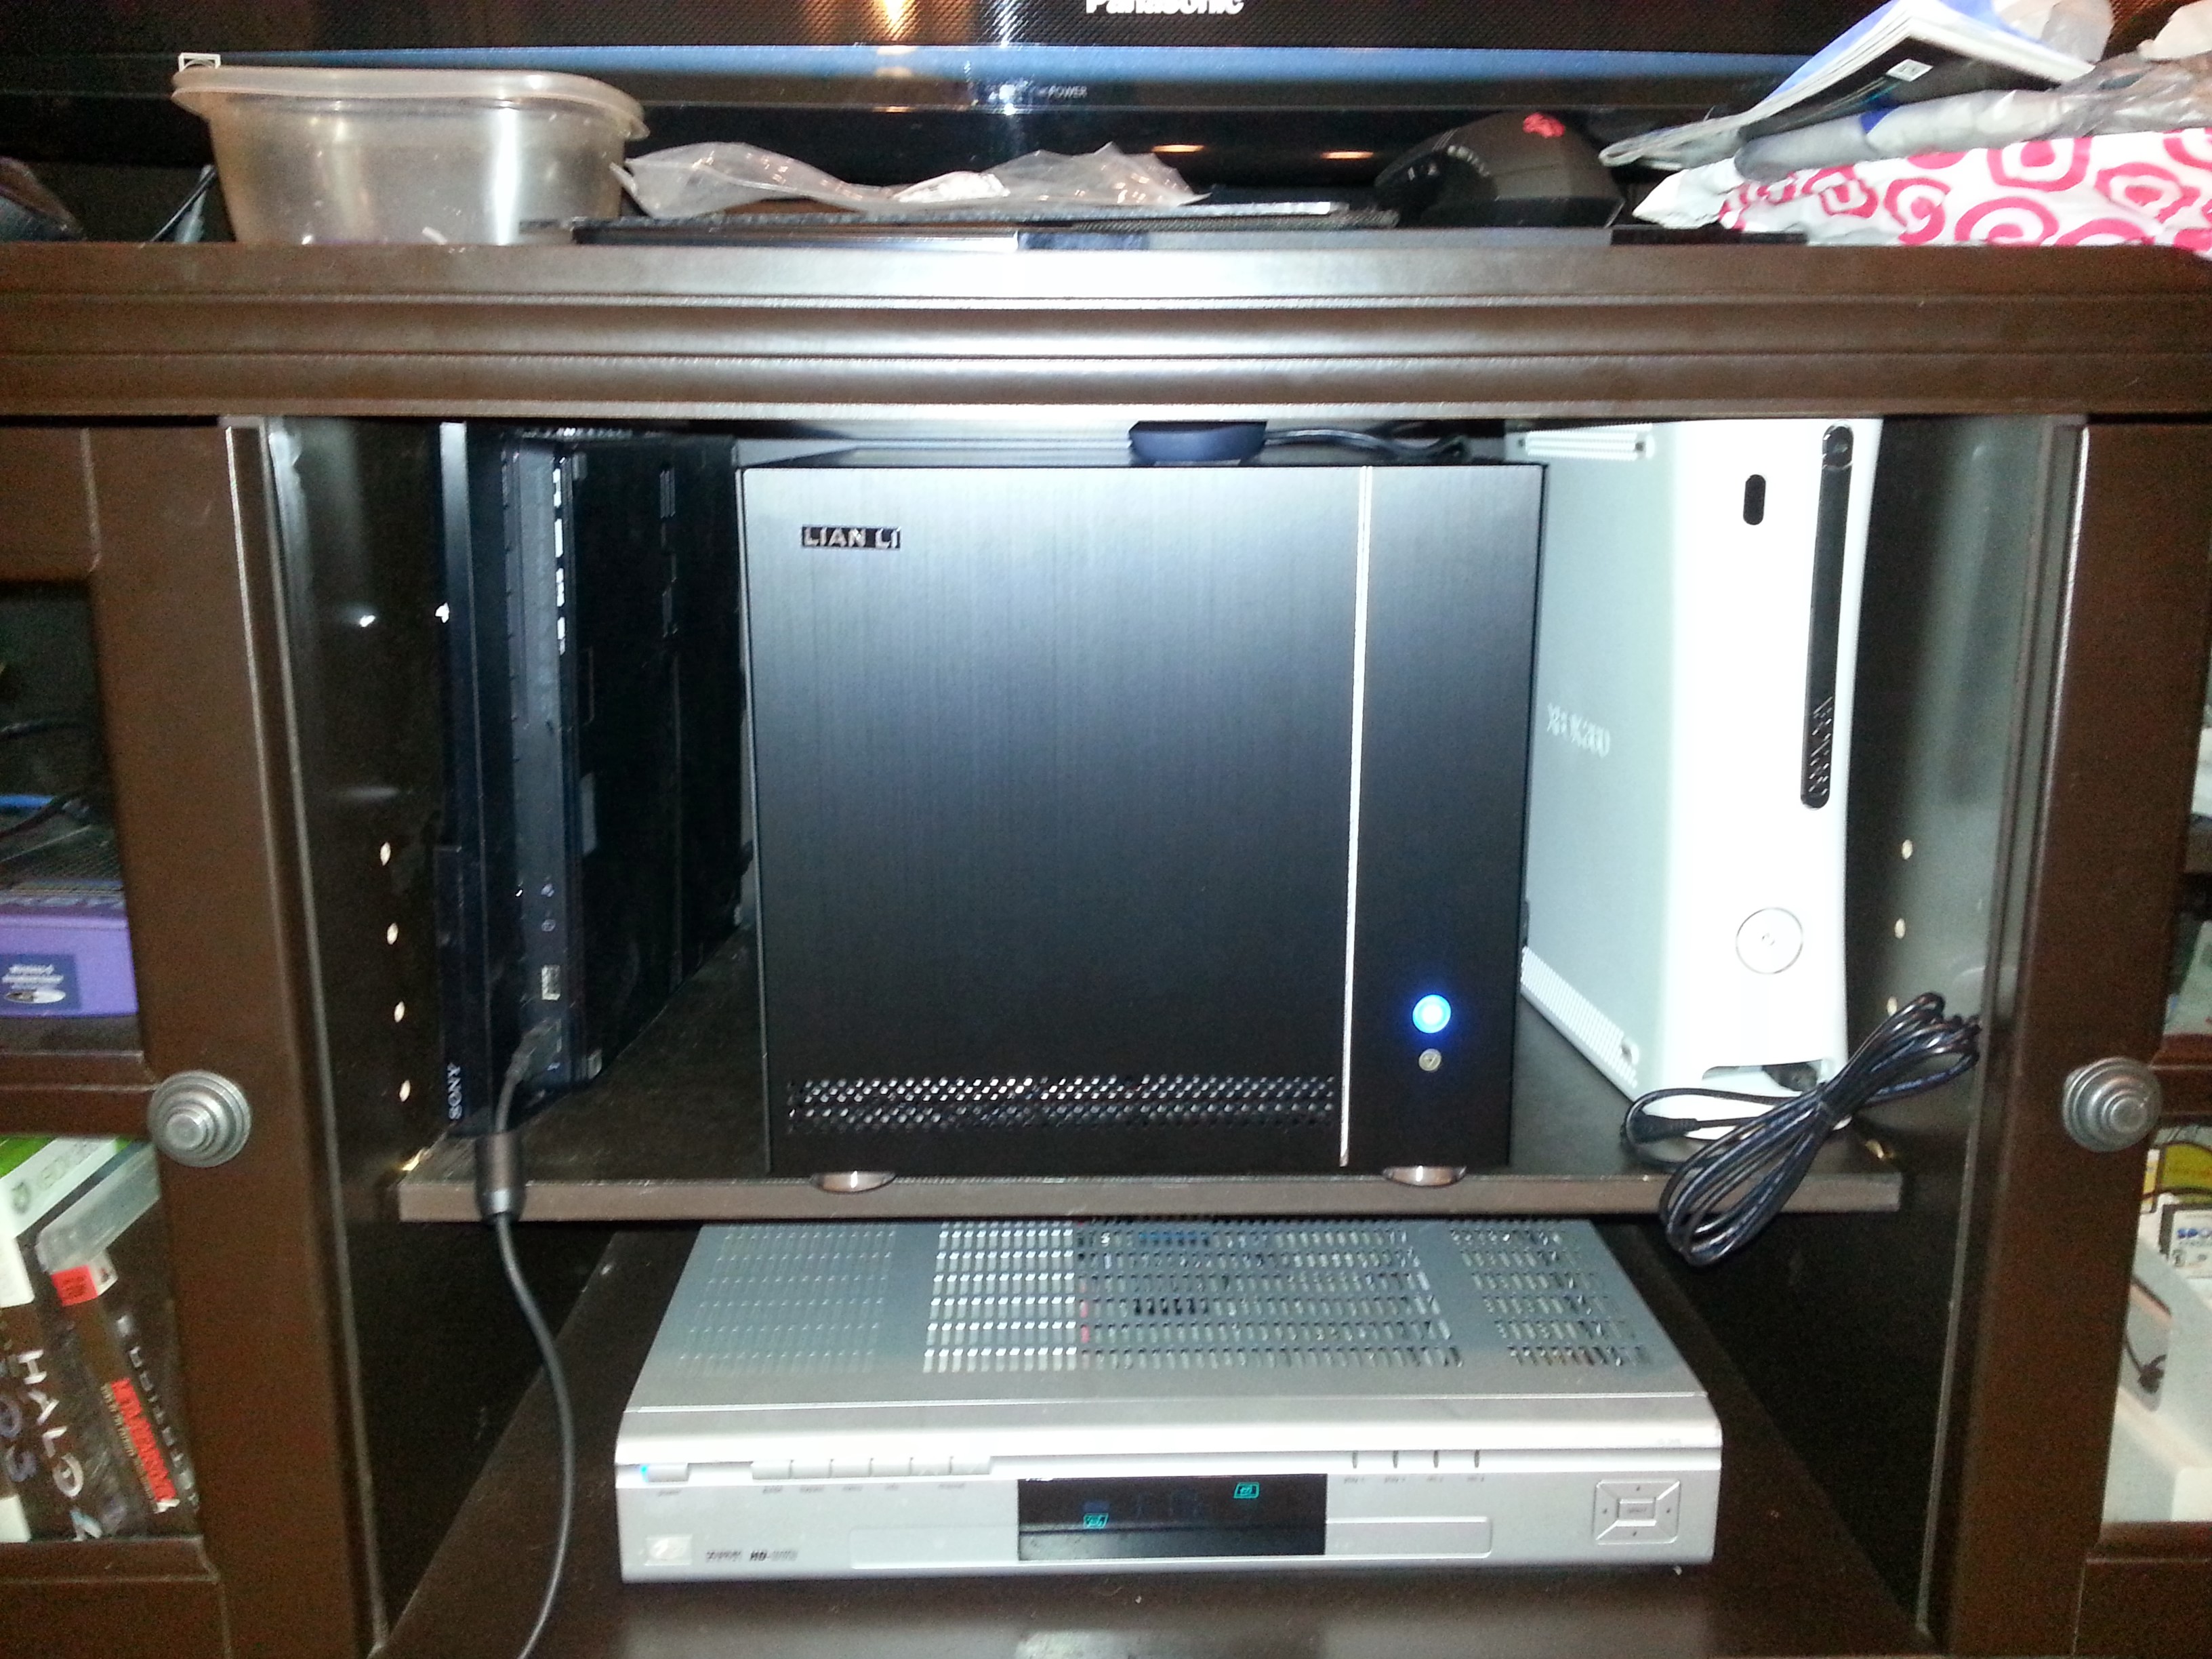
Finally, to house all these components, I chose the LIAN LI PC-K6SX case in black. This case is both sleek and practical, featuring built-in sound-dampening materials for a remarkably quiet operation. The minimalist design and silent functionality make it the perfect finishing touch for this build.
A little delayed on the post, but we built a cornhole set, followed one of the many online guides. As you can see, we painted it Mario themed, overall I think it turned out really good!
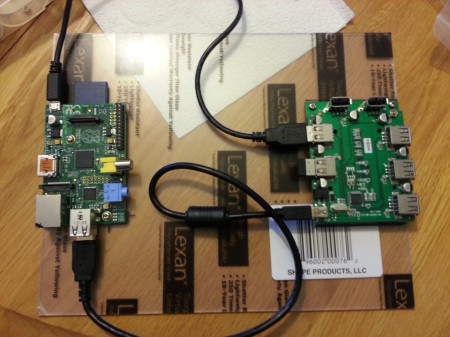
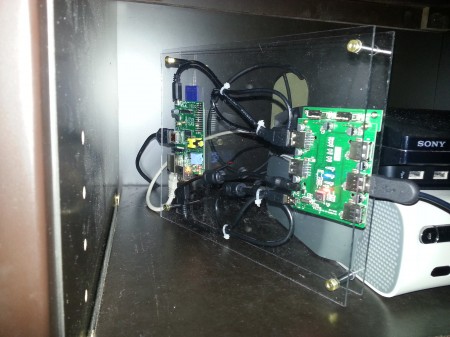
I received a raspberry pi 2 for valentines day, so I set off on a new project. I found a Bentley Compu-vision at good will. Used this as the case for my original raspberry pi, usb hub, usb hard drive, and new raspberry pi 2.
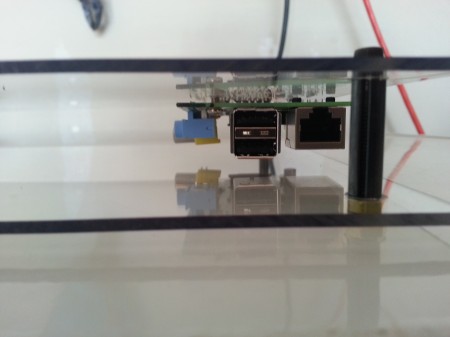
Just wanted to provide an update from my previous post (https://akschaefer.com/2013/08/11/flatpi/ ). I did a new layout which allows me to easily access the Power, Ethernet, and HDMI without any issues. The previous layout I had to get my hand in the middle to unplug the device. I also added a USB hard drive, the connector I used is from an xbox 360 transfer kit, I just removed the plastic cover.
I have been working on my raspberry pi for a little while now, but finally completed the case for the project. I was originally going to use a pico-itx case I acquired, but with the layout of the raspberry pi board, it just didn’t work out. When I was looking online, I noticed some of the DIY plexiglass projects that I really liked. Due to the layout of my entertainment center and that is when I decided I was going to make my “FlatPi” project. One of the other things that bothered me with some of the cases I have seen is you are almost always required to use a USB Hub, so people create beautiful cases for just the pi, but then have a wiring nightmare when they add their hub. My goal was to make it all in one.
Required Parts
Raspberry Pi
Pluggable Technologies USB Hub
8×10 Plexiglass / Lexan .093 (2 pieces)
USB Cables (Monoprice is your friend)
Screws ( I used 1 1/4″ screws)
Spaces between boards ( I found some at the local hardware store)
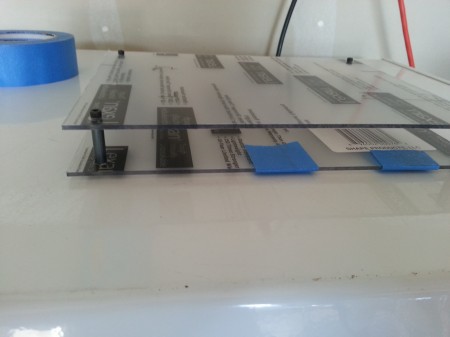
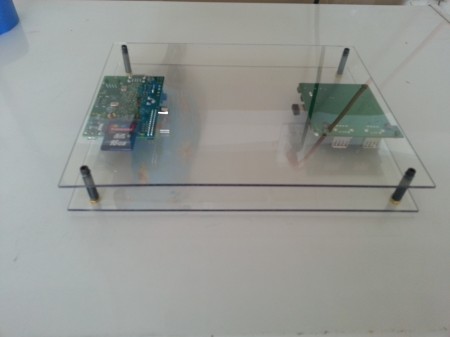
First time mounting the boards to the lexan.
Working on the case
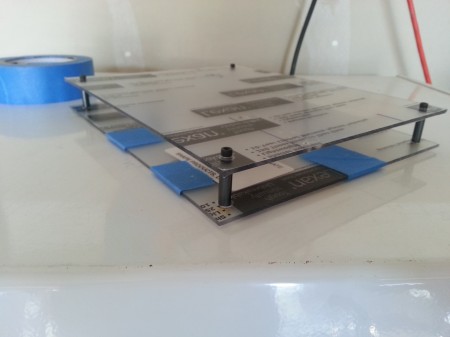
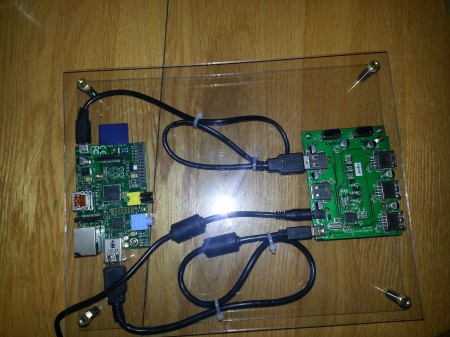
Got the Pi and USB Hub mounted.
The screws I used were from PC builds. I drilled small holes that would allow me to use the screws and make new thread in the plexi glass. Its not shock proof, but it holds the Pi and Hub in place.
I had to make some countersunk holes where I mounted the hub due to the solder leads. I was having problems getting the hub to sit parallel with the plexi glass, once I drilled those holes I was able to get it to sit parallel.
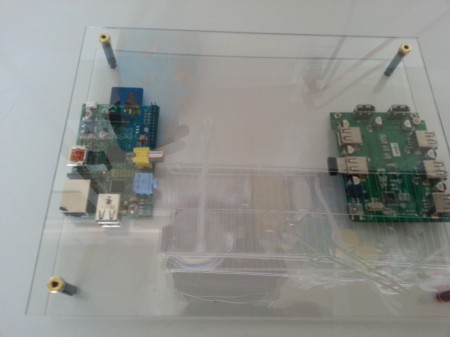
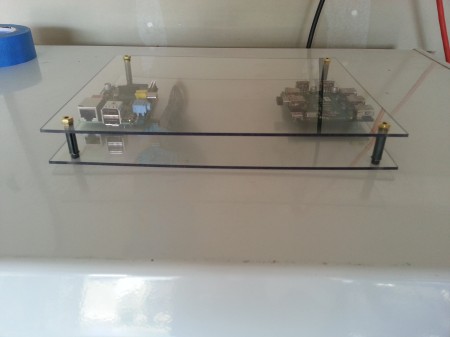
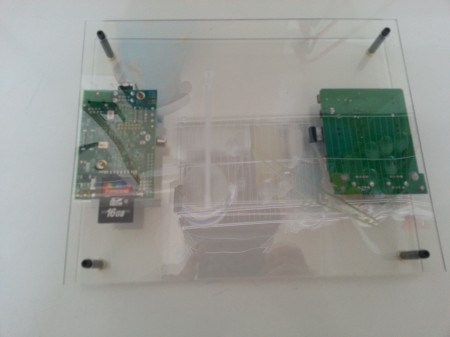
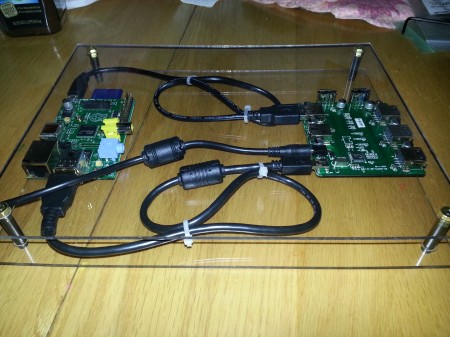
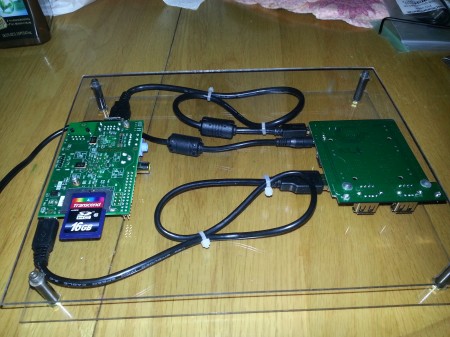
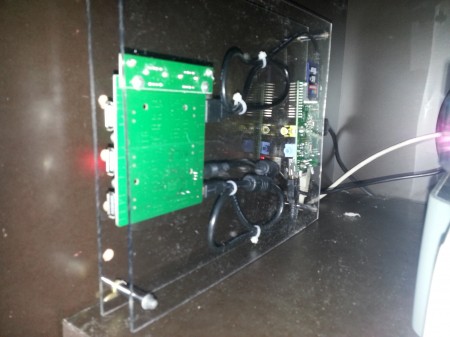
Took a few pictures to show the layout I chose for the boards. Back side the FlatPi.
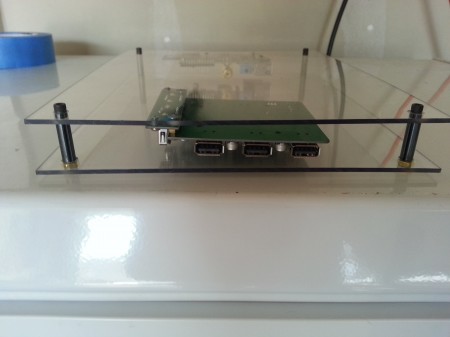
Bottom side of the FlatPi.
Front side of the FlatPi.
I listed USB cables above, I did buy 1.5ft cables to reduce the cable management. Plus you can’t go wrong with monoprice when cables are less then a dollar.
The top cable is the power core (USB to USB Micro)
The bottom cable is the hub connector, the hub did come with a cable, but it was 6ft long, so the 1.5ft cable worked out well.
The middle cable is the USB Hub power connector
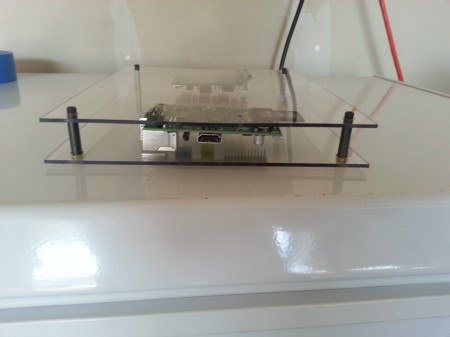
Backside of the Flatpi.
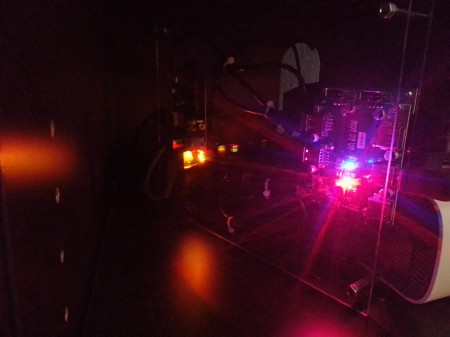
Wanted to show how much light the Pi/Hub produced.
This is the side that sit against the wall, but here is the lights.
Same picture just with the flash on.
Due to limited space, I wanted this to mount vertically, here is where I am going to install it in my entertainment center.