This step-by-step LS swap guide walks through installing an LS engine and 4L80E transmission into a 1973–1987 Chevy C10 squarebody. Whether you are working with a 4.8, 5.3, 6.0, or similar LS platform, this install covers mounts, fuel system conversion, wiring, cooling, exhaust, and first start tips.
Note: Each model year has small differences you may need to account for during the swap. In my previous posts, I cover the why I am LS swapping my truck and the ls engine build, now its time to install the engine into the truck.
Its been about 14 months from the time I bought a engine to first start. Since I was taking my time and buying parts as I went, helps explain why it took a year. Obviously if you are not doing major modifications or have more experience or just buy all the parts at once it might go quicker. I totally understand some people tackle LS swaps in a weekend or realistically a couple of weekends.
To help navigate check out the table of contents to jump to a specific section.
- LS Swap Engine and Transmission Mounts for 73-87 C10
- How to install the Engine and Transmission
- Intake and Coil Pack Installation
- Converting to an EFI Fuel System
- Electrical and Engine Control Unit (ECU)
- Transmission Cooling for the 4L80e
- Engine Cooling System
- Long Tube Headers and Exhaust for LS Swapped C10
- First Start
- Parts List
- LS Swap C10 FAQ
- Resources
- Conclusion
LS Swap Engine and Transmission Mounts for 73-87 C10
There are various engines mounts out there; Dirty Dingo and Tejas Steelworks seem to be the two most popular ones. I went with Tejas for both the engine and transmission mounts based on research I did. The Tejas mounts allowed me to use my stock oil pan as I mentioned above with no issues. Overall the Tejas Steelwork mounts definitely were quality made products. Links to both mounts are at the end.
How to install the Engine and Transmission
It feels like it has taken forever to get to this step, and it has been. I am at about 11 months in and taking my time with the engine and assembly. I was parked the truck perpendicular in the garage and which allowed me to use all three stalls and have more working room. I am very lucky that my wife was chill with it.
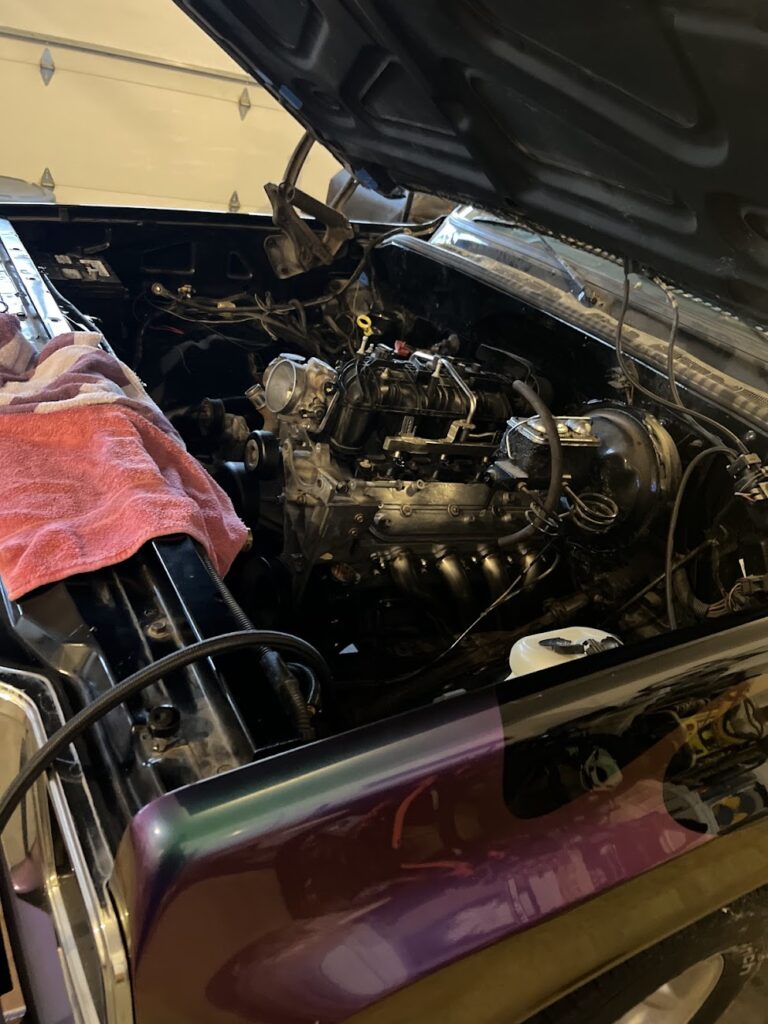
Note: I am not covering any details here on how to remove your old engine, but my wife captured this photo of me working in the engine bay one evening.

I didn’t want to mess with trying to get the torque convertor aligned with the flywheel while in the vehicle. I also had no good way to get the transmission by itself in the garage, so I attached them before installing in the vehicle.
Here we used the engine hoist and luckily I had a good friend take photos of the process, otherwise I wouldn’t of gotten any of the process.

Here you can see threading the transmission and engine in like a needle, really big needle. Luckily the load leveler from harbor freight helped do the heave lifting. Highly recommend even though I felt like I spent a ton of time cranking the leveler, it was pretty easy compared to the alternative.

After 30 minutes or so of threading in the engine/transmission, we got the engine mounts positioned on the frame mounts and the bolts in. At this point in time I didn’t have the transmission mount in yet, so I was holding the transmission up with a floor jack. I then was able to slip in the transmission mount and drill out the holes and mount it using the supplied hardware.


Intake and Coil Pack Installation
The intake is one of the easiest steps here, its like 8 bolts and just drops onto the heads. I did buy a fuel injector tester to make sure the fuel injectors I bought with the TBSS/NBSS intake were good since it was off of Facebook Marketplace as well.
Here is a tip if you are looking to save some money on a swap. I ended up with 2 sets of coils, so I decided to just reuse them and keep a set for spares. Like the engine, the coils were rusty so, I opted to sand and paint them. They are not show quality, but lots of elbow grease and some paint cleaned them up nicely.

After the coil packs are installed, you can install the spark plugs and coil wires as well. I have links to what I used below.
Converting to an EFI Fuel System
Since I was moving from a carburetor to fuel injected, I ended up buying a new fuel tank, fuel pump, sending unit, fuel lines, and connectors. You can luckily buy a 1987 squarebody fuel take that will fit all 73-87 trucks without any issues.
Here is a step by step video video on how to install a fuel pump in a squarebody fuel tank that makes it easy and straightforward.
Here the fuel line from the tank and pump is now connected to the fuel rail on the TBSS/NBSS intake.

Electrical and Engine Control Unit (ECU)
The engine control unit (ECU) and which route you go plays a big decision into your final installation. You can go with a factor ECU that you use stock or have it flashed for engine upgrades or you can go for an aftermarket ECU, like the Holley Terminator X, Holley Terminator X Max or Aces Jackpot LS kits.
I went with the Holley Terminator X Max system which is both an ECU and Transmission Control unit for the 4L80e.
The directions that are included in the Holley installation are pretty straight forward, however I recommend reading the direction about 3 times before you attempt to start. The wiring harness just plugs into the sensors on the engine.
Transmission Cooling for the 4L80e
Depending on your setup, this step may be optional. With me moving to a 4L80e, I wanted to make sure I had a transmission cooler installed to help keep the temps low. I had to buy some connection adapters that went into the transmission and then ran lines up to the radiator and then mounted the transmission cooler to the front of the radiator
Engine Cooling System
I keep my stock radiator for my setup, however I have seen other use a 454 radiator that provides better cooling. I am using a electric fan for a Ford Taurus that I installed over 20 years ago, they move a ton of air and keep it cool. I do have an electric relay to control the fans and then used the outputs from the Holley Terminator X to control when they turn on and off.
In the future I would like to upgrade to something else, but I was in a rush to get it running so went with what I had.
Long Tube Headers and Exhaust for LS Swapped C10
For the exhaust I went with speed engineering 1 3/4″ Longtube headers made for the C10s and doing LS Swaps. I did need to cut the ear off my 4L80e to get the headers to clear, but it was pretty straightforward.
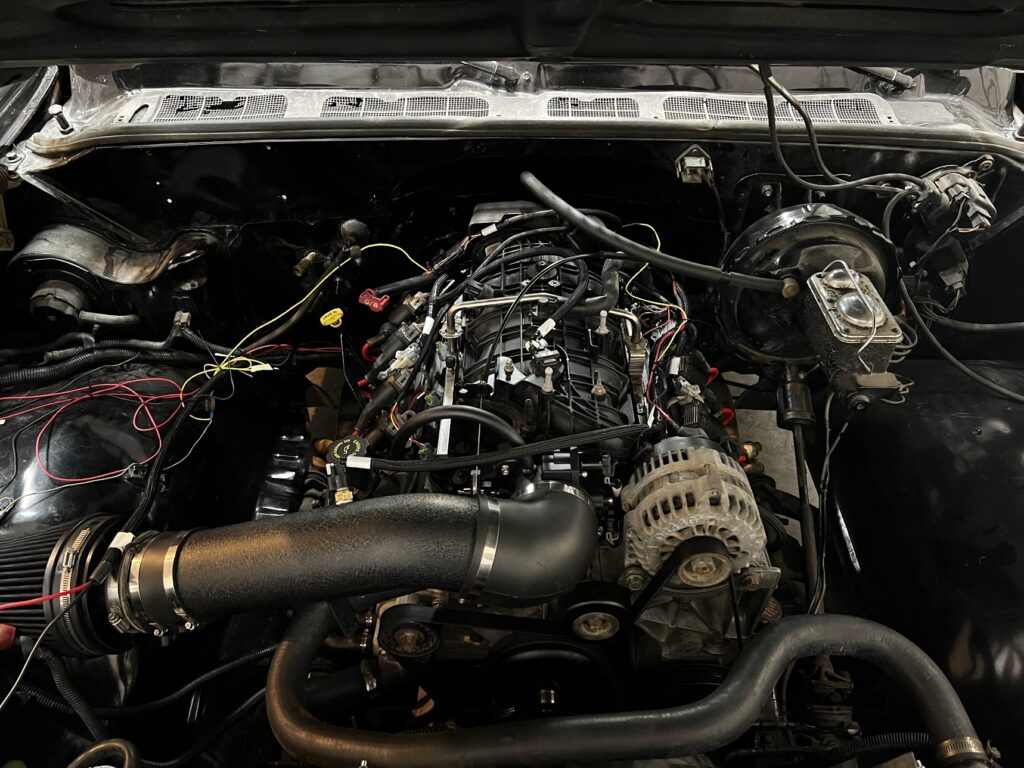
First Start
Here is the final product! I have some wiring I could clean up, but overall it looks good!
Parts List
Note: Please note that these are the parts I bought for my project, ever project is different and you may need to buy different parts.
Engine parts
- Fi-tech Throttle Body
- Cold Air Intake
- NGK TR6 Spark Plugs
- ICT Billet LS Valley Pan Cover Plate
- LS Head Bolts FEL-PRO 72173
- Brian Tooley Racing (BTR) .560″ Lift LS6 Beehive Valve Springs
- ICT Billet Camshaft Thrust Retainer Plate
- Melling Performance Oil Pump 10295
- Brian Tooley Racing (BTR) Truck Norris
- Summit Racing LS2 Timing Chain
- Summit Racing Performance LS7 Hydraulic Lifters
- Brian Tooley Racing (BTR) Pushrods
- LS Swap 1 3/4″ Longtube Headers
- Spark Plug Wires (that fit the headers)
- Tejas LS Motor Mounts
Sensors
- Holley EFI 534-20 Air Temp Sensor
- Oil Pressure Sensor 12677836 – Works with Holley Terminator X, stock LQ4 sensor does not work with Holley Terminator X
Cooling Related
- Radiator Hose (Lower)
- Radiator Hose (Upper)
- Heater core bypass hose
- ICT Billet – LS Coolent Crossover Steam Tube
Transmission
- 6AN PTFE Hose End Fittings
- Hayden Transmission Cooler
- AN6 PTFE Line (For Transmission)
- ICT Billet 4L80e Transmission Adapter 6AN
- Transmission Mount
- ICT Billet Bell Housing Bolts
- Torque Converter Bolts – ARP2307305
- Tejas Steelworks Transmission Crossmember
Fuel System
- Sprectra Premium Fuel Tank GM1C
- Sprectra Premium FG05N Fuel Sending Unit
- Speedway AN6 LS Fuel Filter and Regulator
- Walbro Electric Fuel Pump
- AN6 Hose Separator Clamps (for Fuel and Transmission lines)
- AN6 CPE Fuel Line Kit with Hose
- AN6 CPE Hose End Fitting
- 6AN Male to 3/8″ Hardline Compression Fitting (to connect to fuel pump, main line)
- 6AN Male to 5/16″ Hardline Fitting Adapter (to connect to fuel pump, return line)
- 6AN Male to 3/8″ Quick-Disconnect Female (for TBSS/NBSS Fuel rail)
- 6AN CPE Fuel Line 20 Ft
- Hose Clamps
Engine Control Unit
- Holley Terminator X MAX (check parts numbers)
Misc. Parts
- Engine Enamel Primer
- Engine Enamel
- Firewall Aluminum Grommet (Works but very tight fit)
- Ground Strap
- TBSS/NBSS Throttle Cable
- Holley 4 Pin Alternator Plug Wire
- LS Billet Aluminum Oil Barbell
- Lucas Assembly Lube
Tools List
- Latex Gloves (These are higher quality then harbor freights)
- Valve Sprint Compressor for LS Heads
- Fuel Injector Tester Kit
- Adjustable Pushrod Length Checker
- LS Harmonic Balancer Installation Tool
- Harbor Freight Load Leveler
Note: As an Amazon Associate I earn from qualifying purchases. No additional cost to you.
LS Swap C10 FAQ
- What is the best LS engine for a 1973–1987 C10?
- 5.3L or 6.0L truck LS engine is the most common due to affordability and availability.
- Can you LS swap a C10 in a weekend?
- It is possible with all parts ready, but most DIY builds take several weekends.
- Do you need to upgrade the fuel system for an LS swap?
- If you plan to run fuel injection on an LS-swapped C10, converting from a carburetor to EFI requires a high-pressure fuel pump, return fuel lines, and proper fittings. Alternatively, carbureted intake manifolds are available if you prefer to run a carburetor on an LS engine.
- What transmission works with an LS swap in a C10?
- Common transmissions for LS-swapped C10 trucks include the 4L60E, 4L80E, and manual options like the T56. In this build, I used a 4L80E paired with a Holley Terminator X Max, which allows the ECU to control both the engine and transmission.
- You can also use older transmissions like the TH350 or TH400, but you will need the correct flexplate, torque converter, and adapter components to make them compatible with an LS engine.
- What mounts are needed for an LS swap in a 1973–1987 C10?
- Most LS swaps into squarebody C10 trucks require LS swap engine mounts and a compatible transmission crossmember. Popular options include mounts from companies like Dirty Dingo and Tejas Steelworks. These mounts allow the LS engine to bolt into the factory frame locations while maintaining proper engine placement and oil pan clearance.
Resources
Here are some links to other popular resources, as I don’t think there is a single guide that covers everything:
- https://tejassteelworks.com/wp-content/uploads/LS-Swap-Guide-73_87.pdf
- https://www.speedwaymotors.com/the-toolbox/best-ls-heads-for-6-0-5-3-4-8-cathedral-port-heads-vs-rectangular/143510?msockid=28ef534102fd6426317246e203926535
- https://hotrodfuelhose.com/blogs/rad-hot-rod-fuel-hose-stuff/ultimate-fuel-system-guide-for-73-87-c10-k10-squarebody-trucks-ls-swaps-and-efi-conversions
There are some good Facebook groups out there as well, but be prepared to put up with the bs sometimes.
Conclusion
I hope you enjoyed this guide, there is a ton of detail here due to the nature of this project. This is a first draft and plan on updating if there is any feedback. If you have questions feel free to drop me a comment.
3 thoughts on “1979 Chevy C10 LS Swap Guide”