We were interested in getting solar as we knew the benefits of reducing our carbon footprint and getting free electricity. When we started looking it was right at the beginning…
Covering write up and how to guides on house projects, including woodworking and homebrewing.
We were interested in getting solar as we knew the benefits of reducing our carbon footprint and getting free electricity. When we started looking it was right at the beginning…
Every year I like to provide an update on my solar generation, electricity usage, month electricity cost and a few other metrics. If you would like to look at previous…

At this point, I have now started a tradition to post my solar and electricity usage and metrics from the past year. If you would like to look at previous…
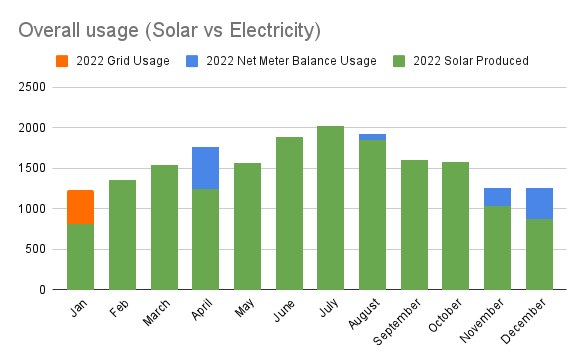
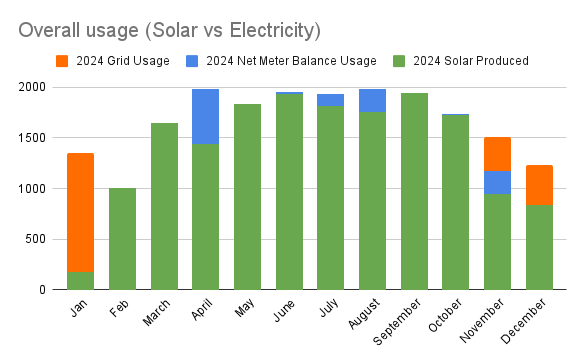
Just received my December bill from Alliant Energy, so now I can share our solar production and electricity usage over the last year. Since Alliant’s bills are not actual months,…
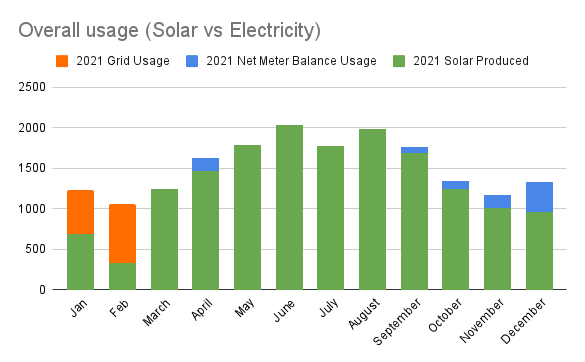
We got solar installed in August 2020 and authorization to operate starting in October. We didn’t produce much electricity in 2020, so I started keeping track of data starting in…
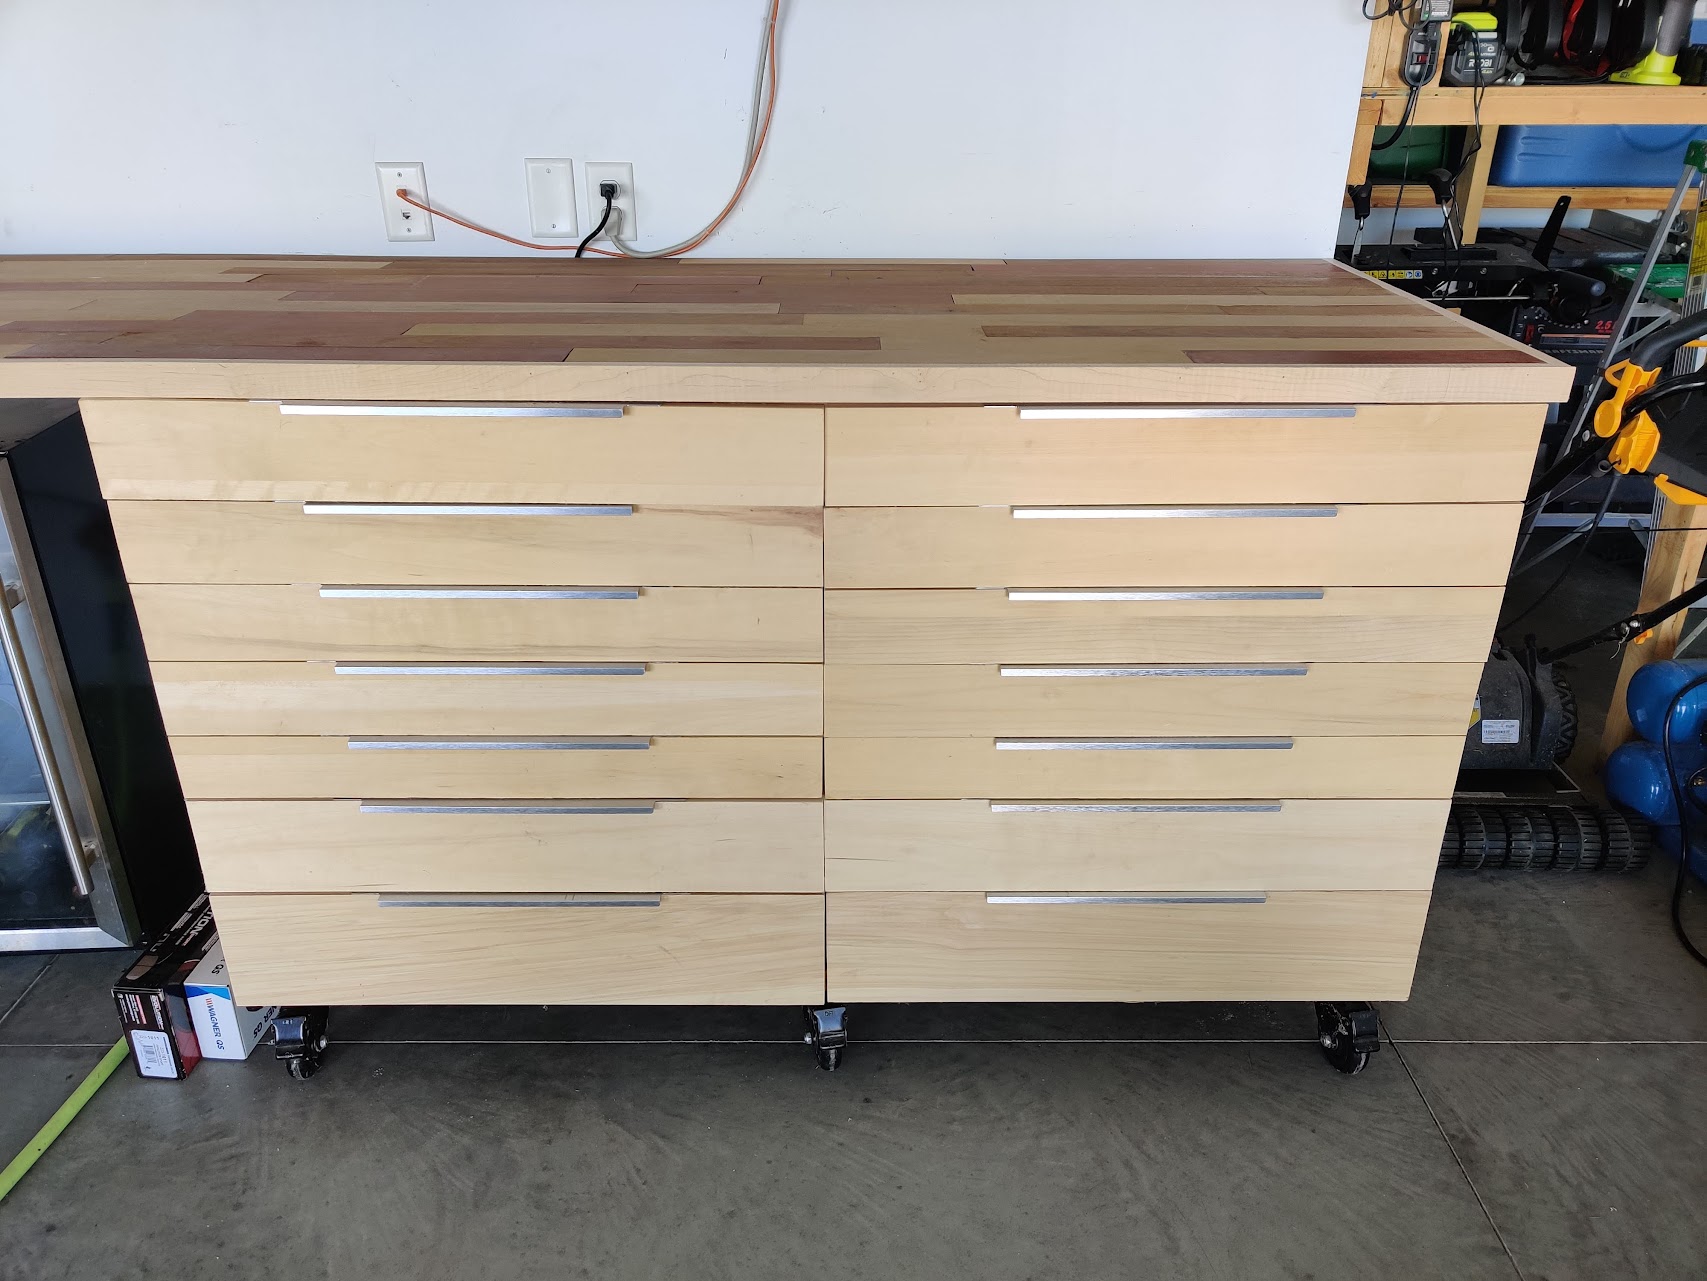
As my tool collection was starting to grow and outpace my toolbox, I decided was going to build a tool box that custom fit the location in the garage where…
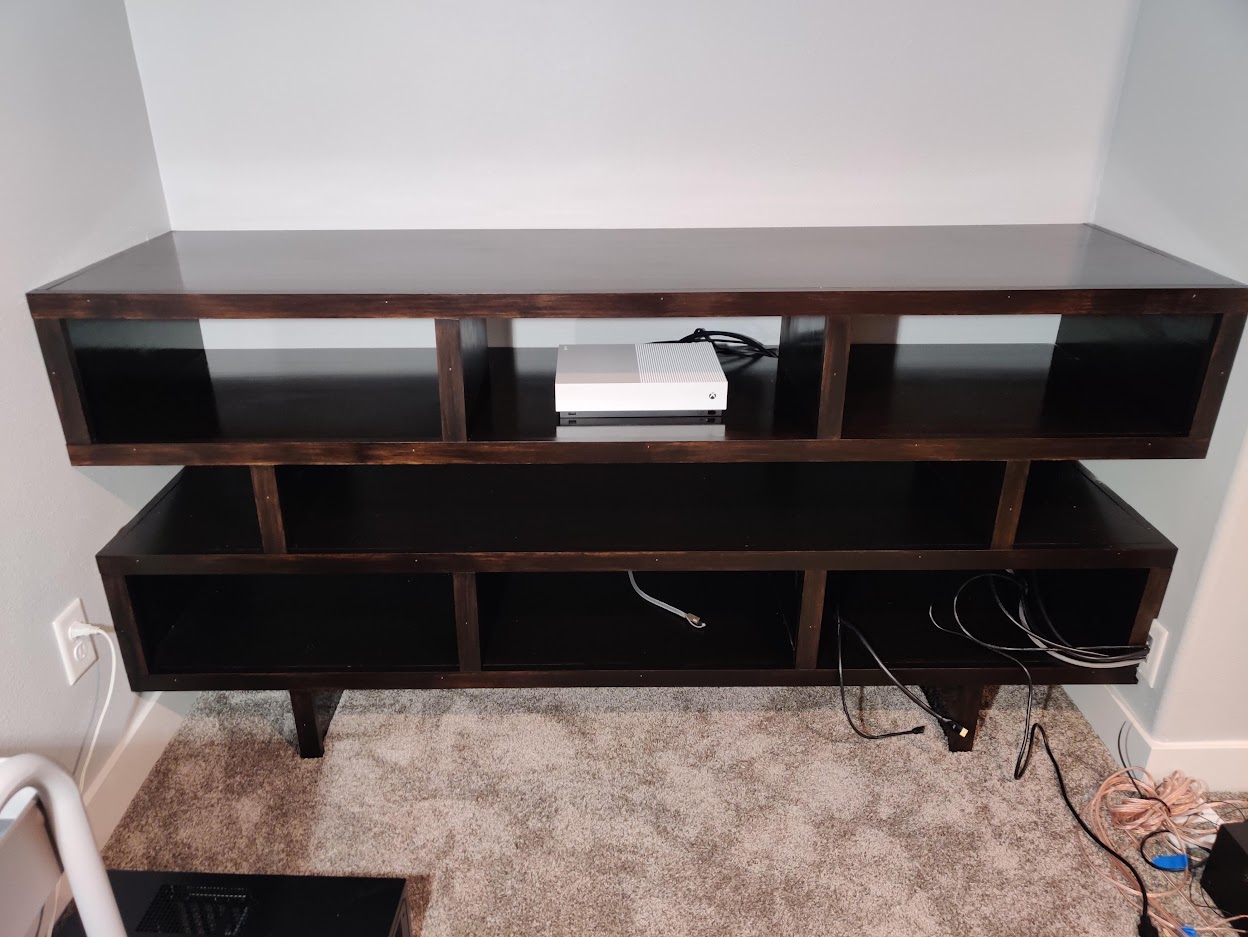
I wanted to make an entertainment center to hold my receiver, computer/htpc, PS3, Xbox, SNES, and NES to fit a custom space. I started with taking measurements of the computer…
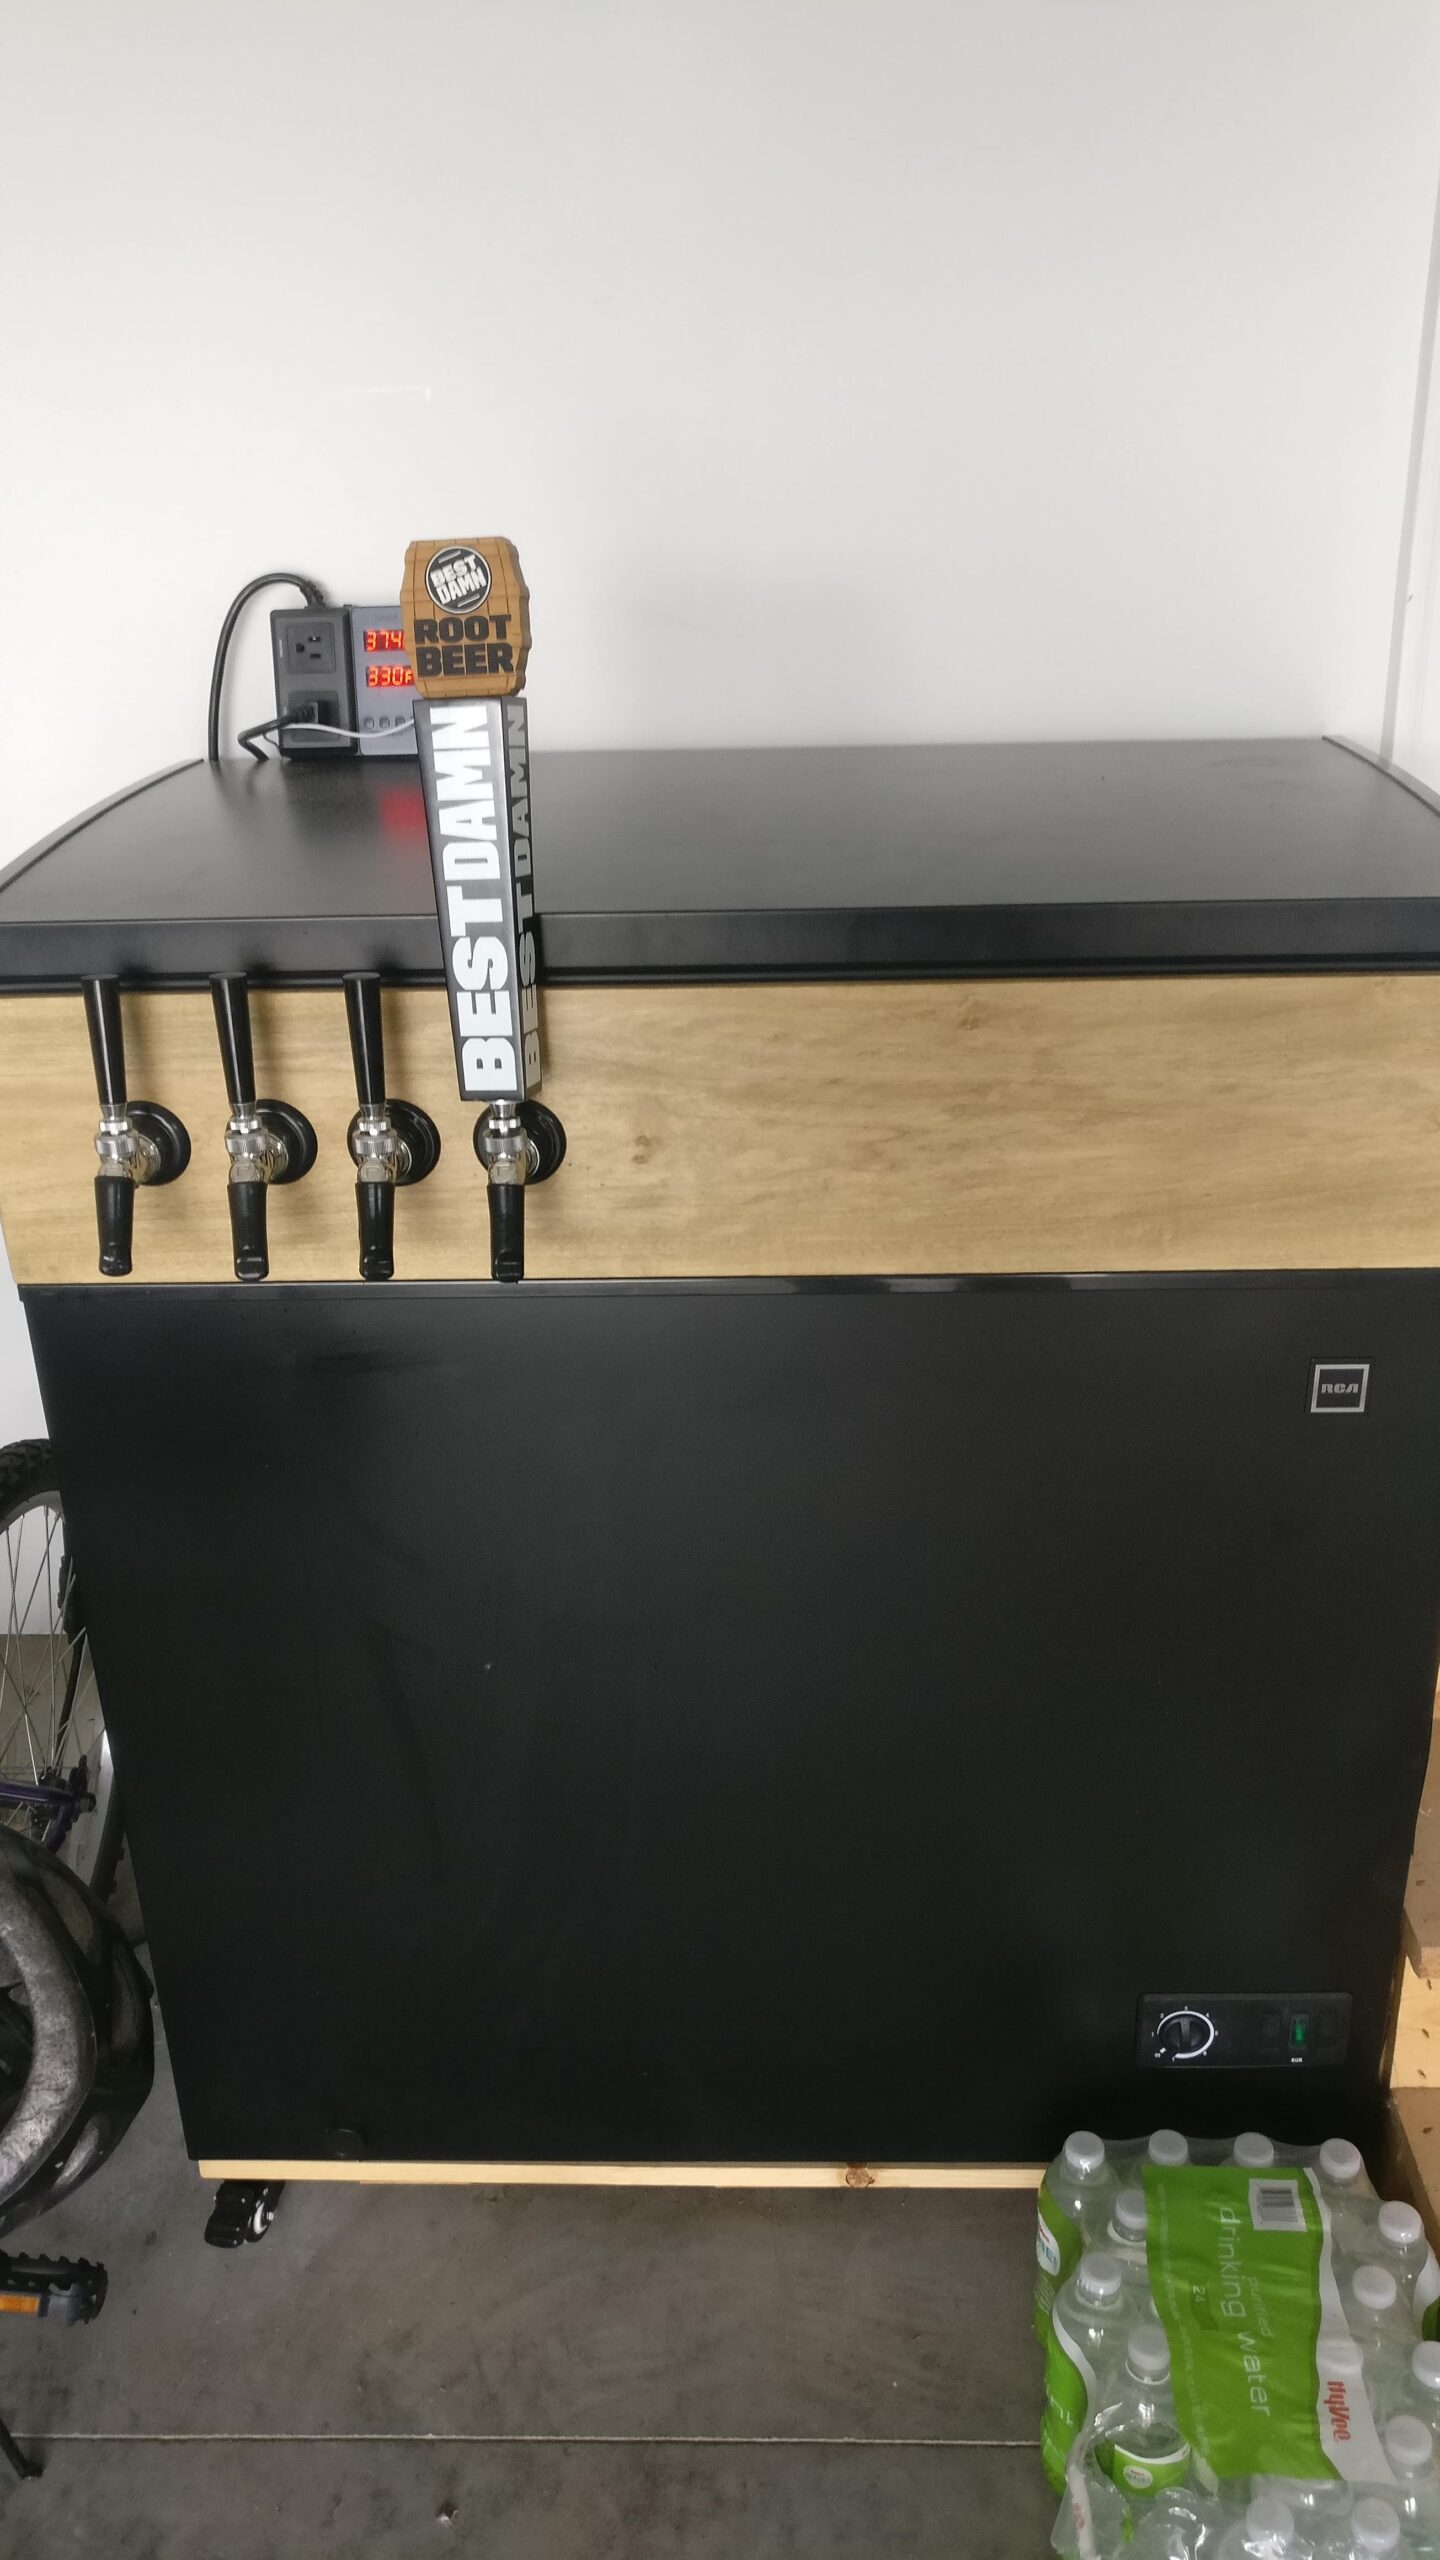
Want to enjoy your freshly brewed beer without the hassle of bottling? It’s time to build your own kegerator and pour the perfect pint straight from the tap! I have…
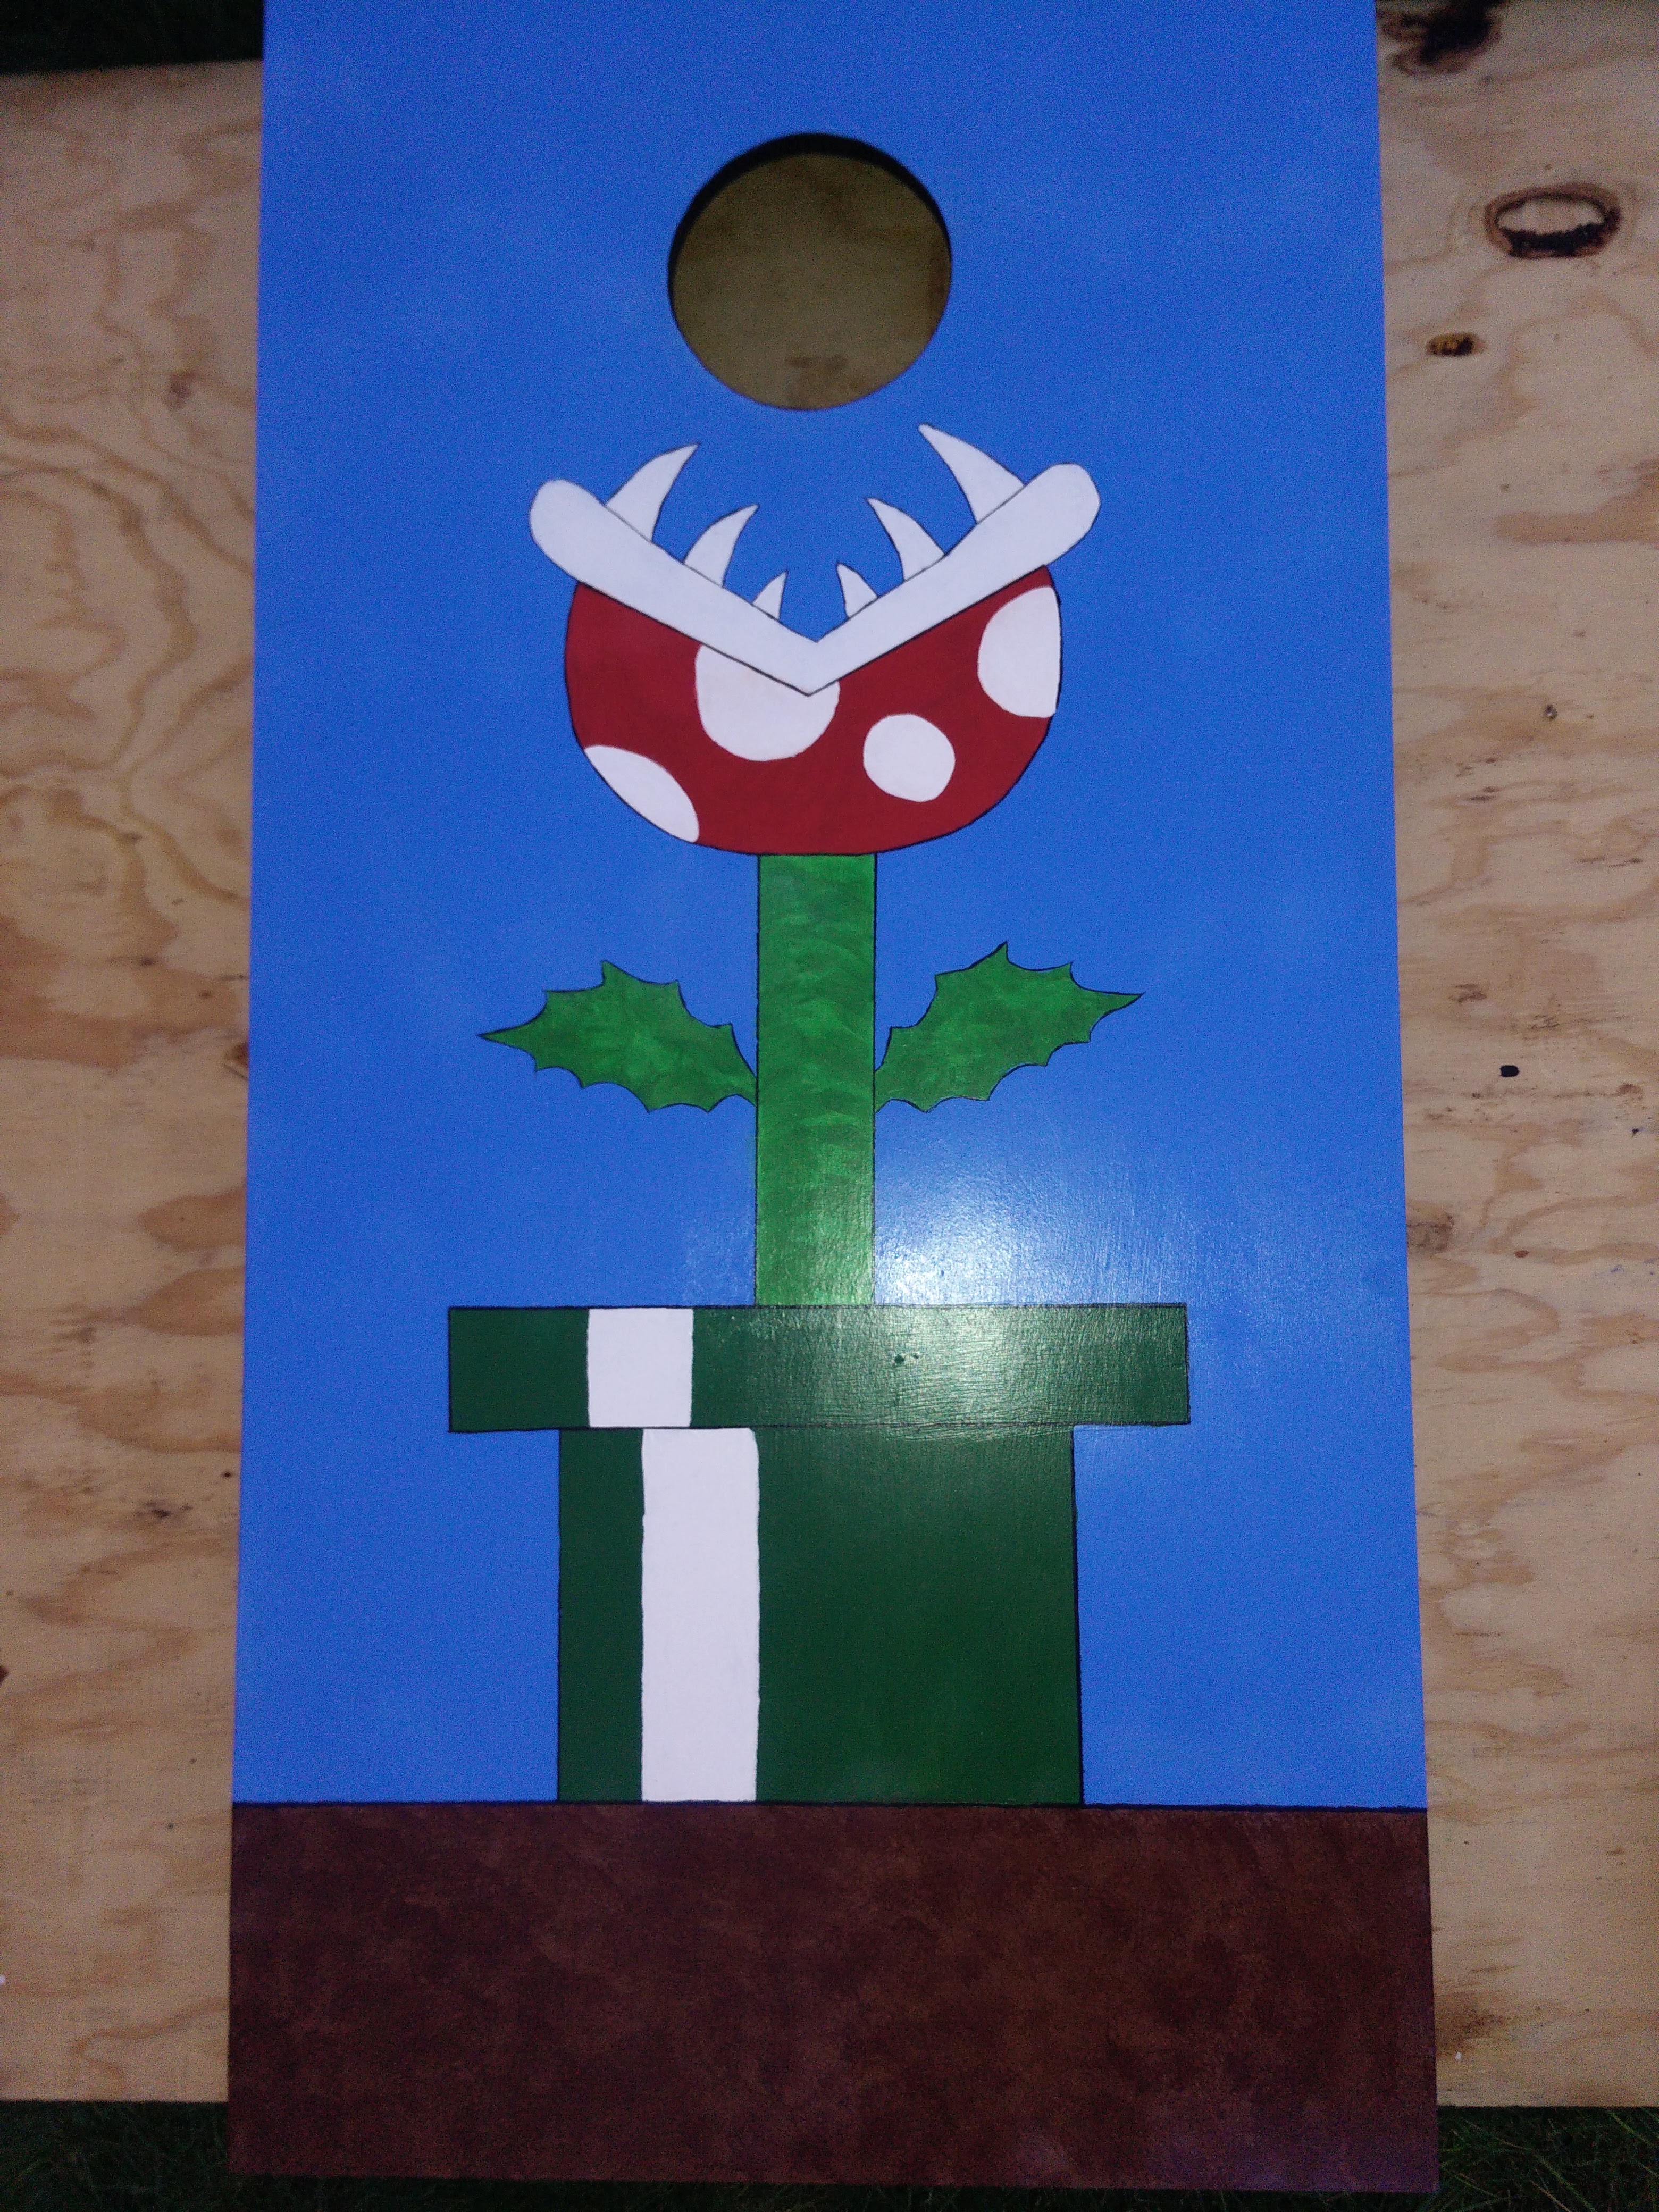
Cornhole (also known as bags) is a fun and popular game, perfect for backyards, tailgates, and barbecues. Standard cornhole board should measure 48 inches long by 24 inches wide, with…
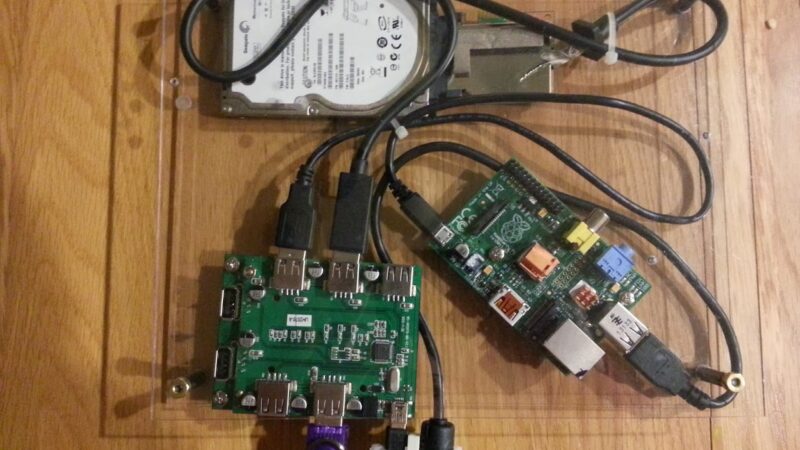
Just wanted to provide an update from my previous post (https://akschaefer.com/2013/08/11/flatpi/ ). I did a new layout which allows me to easily access the Power, Ethernet, and HDMI without any…