I was looking at replacing the seats in my 79 Chevy C10 and wanted to walk through how I got some 1991 Chevy Suburban seats to fit.
Many years ago I switched out the seats from a Chrysler LeBaron (around 1990s style), which worked good for many years. Unfortunately one winter a mouse got in the truck and made a nest on the passenger seat and chewed a baseball size hole in the fabric as you can see in the photo below. After that I was ready to switch them out to something else.

I found a few suggestions online of what people did and decided the square body style Suburban seats would be a good idea as they should fit with minimal modifications. After looking for a couple of months on Facebook marketplace, I found someone parting out a 1991 Suburban that happened to have blue interior, but he didn’t have the seats specifically listed, after contacting him and getting a few photos they looked to be in decent condition and he only wanted $100. Which is a steal at that price. I showed up and figured he had them out, nope ended up being a pull yourself, luckily he offered to help as I had a minimal toolkit that I left there ugh.
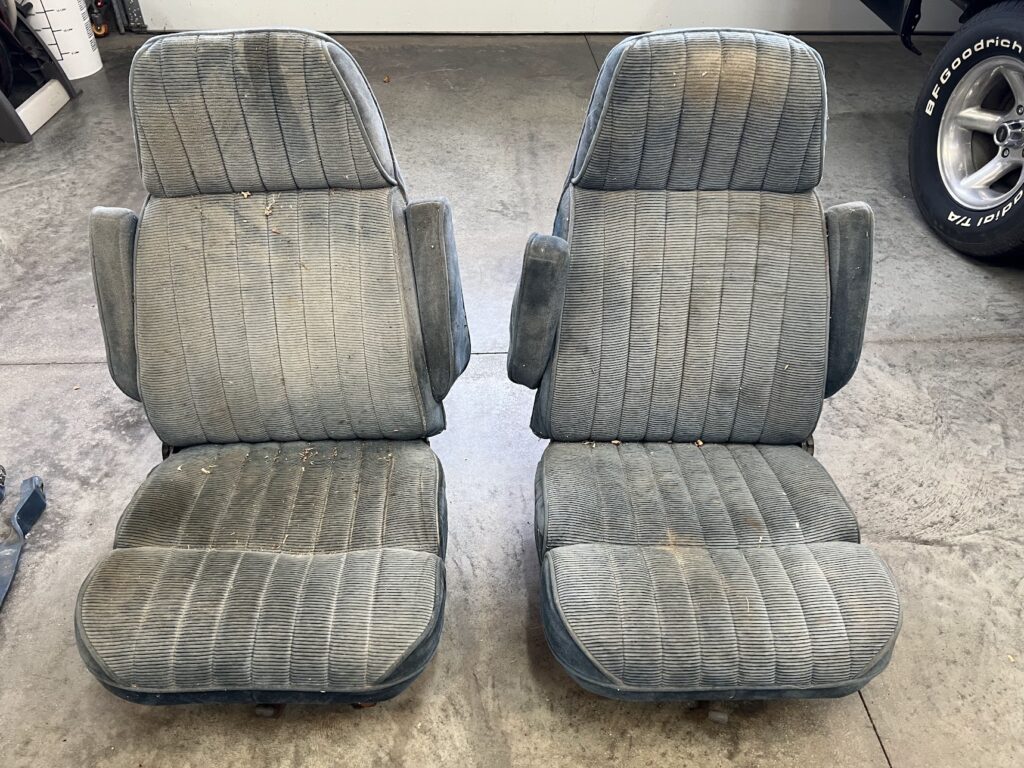
I brought them home and cleaned them up, they were dusty and dirty, but nothing a can or two of upholstery cleaner and a couple rolls of paper towels didn’t take care of.

I then removed my seats and carpet in my truck and test fitted them. After using the LeBaron seats the new Suburban sets felt like they sat so high. Very good chance it felt like the original bench seat, but being taller I didn’t like the way they sat and I was running the LeBaron seats for 20+ years at this point. After looking at different options, I decided to modify the seat brackets.
Going down a rabbit hole of different geometry options, I was trying to move the seats as far back and low as possible to accommodate my height. It was a back and forth game of trying out different options while also trying to figure out how to make new floor mounting brackets as well. With these seats I needed to account for going from 4 mounting points with the original bench seat to 8 mounting points with the Suburban seats.
Breaking it up into the four corners of each seat here is what I did.
Front Outside Seat Brackets
No modifications! The front brackets bolted right into the original bench seat location.
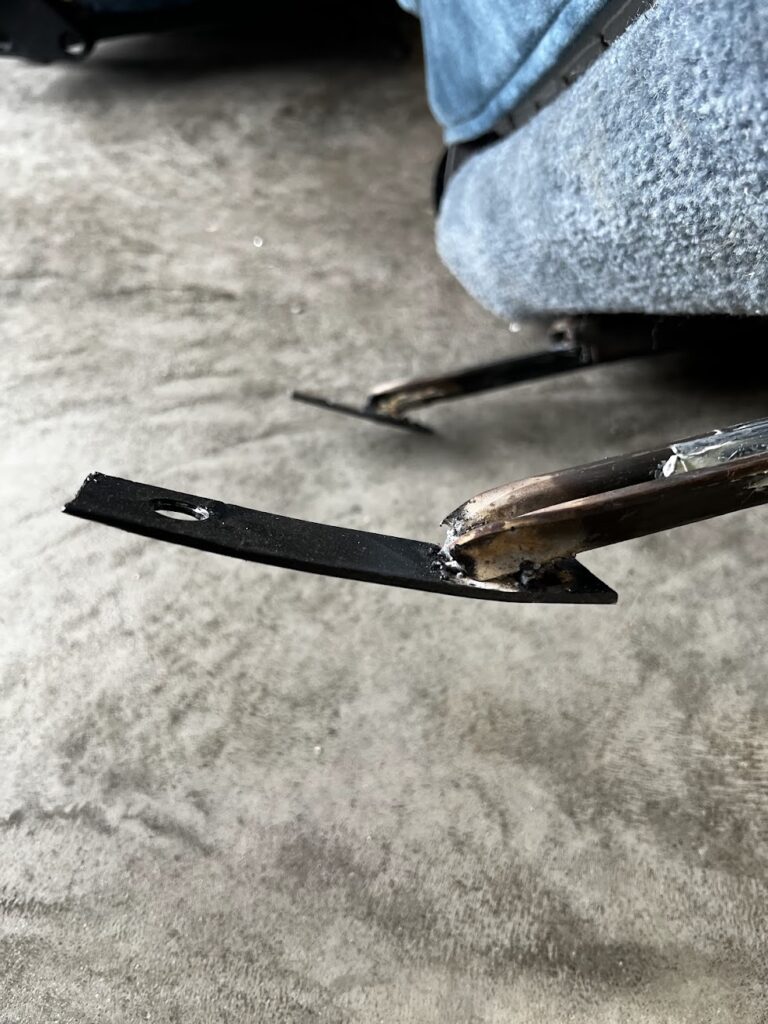
Rear Outside Seat Brackets
I started with the cutting off the rear brackets and welding my own flat bar to make my own mounting bracket that lowered it about 1.5 inches.
Note: If you were okay with the stock height, you could slightly bend the original rear mounting bracket and it would fit the stock bench seat mounting holes with no cutting or welding.
Rear Inside Seat Brackets
Same as the rear outside, I cut off the rear brackets, but on these I used a longer flatbar to accommodate the floor mounting bracket (which I will show later) that is further back then the inside ones.
This picture is of the driver seat, so closet bracket is rear inside, while furthest is rear outside.
Front Inside Seat Brackets
The front seat brackets on the inside need some type of support due to the floor pans being difficult between trucks and suburbans. I made a bracket that required no changes to the seat bracket and was straight forward to build.
Here is a photo from the passenger side, left bolt is font outside and right bolt is front inside.
Floor Mounting Brackets
I went for the easiest and straightforward design that I could come up with.

As you can see I installed some sound deadening material as well, which I will cover in another post here about sound deadening installation, but the foil makes it hard to see, so here is a more detailed photo.

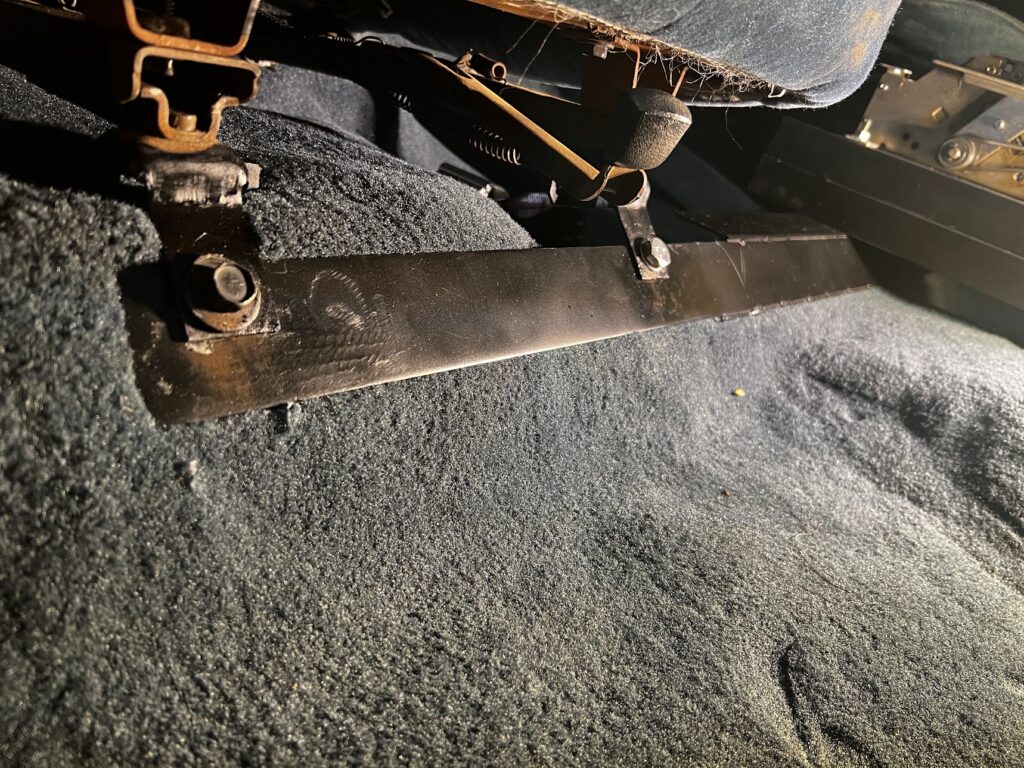
Rear Floor Mounting Bracket
The rear floor mounting bracket is flat iron bar either 3/16th or 1/4 inch thick, about 1.25 or 1.5 inches wide and unsure on the length, but somewhere around 30 inches long. I used the seat belt mounting holes to mount it to the floor and then drilled some large holes and put some bolts facing upward, welded those into place. Those act as the rear inside mounting location. As you can tell, it sits back further then the rear outside location by about 2 inches.
Front Floor Mounting Bracket
The front floor mounting bracket is also flat iron, this one is 3/16 thick and approx 49 inches long. In the middle hidden in this photo, there is a piece of angle iron that helps provide strength to this flat iron, otherwise it would be pretty wobbly. In addition I added another piece of flat iron that is parallel with the floor that I will use as a mounting point for my floor shifter.
Mounting Hardware (bolts)
I was under the impression that my truck was most SAE bolts, but starting to realize it was more metric then I thought. Being a 1979 it was definitely in that transition phase.
The Front and rear outside seat bolt sizes are m10 x 1.5
The inside seat belt sizes are m12 x 1.75
Finished Product
Here is the finished product, I really like the way they look and sit.

Final thoughts
I could have gone with newer seats from a truck or SUV and found leather, electric, heated seats and all; but they just wouldn’t match the style. These seats really fit the era and keep the look authentic.
I am sure it will be a future upgrade to get them redone in blue leather and some nice stitching, but that is a couple of years out yet. You might be wondering why blue? The truck was originally blue with blue interior. Obviously the outside isn’t blue anymore. However I like keeping the blue interior to tie it back to the original roots. The original color would have been more of a medium blue, but the dark blue fits really well in my opinion.
Hope you enjoyed this write up and if you found anything helpful or have questions, leave a comment.
I’m looking to do the same thing! Thanks for the great write-up! Very sharp truck!
Appreciate the kind words!